

When an asphalt plant starts showing unstable output, temperature fluctuations, material feeding issues, or equipment faults, identifying the real cause quickly is critical. A small problem can lead to production delays, higher fuel consumption, and inconsistent asphalt mix quality if left unresolved. This guide helps you identify common asphalt plant problems, check their possible causes, and find practical asphalt mixing plant problem solutions to keep your asphalt plant running smoothly.
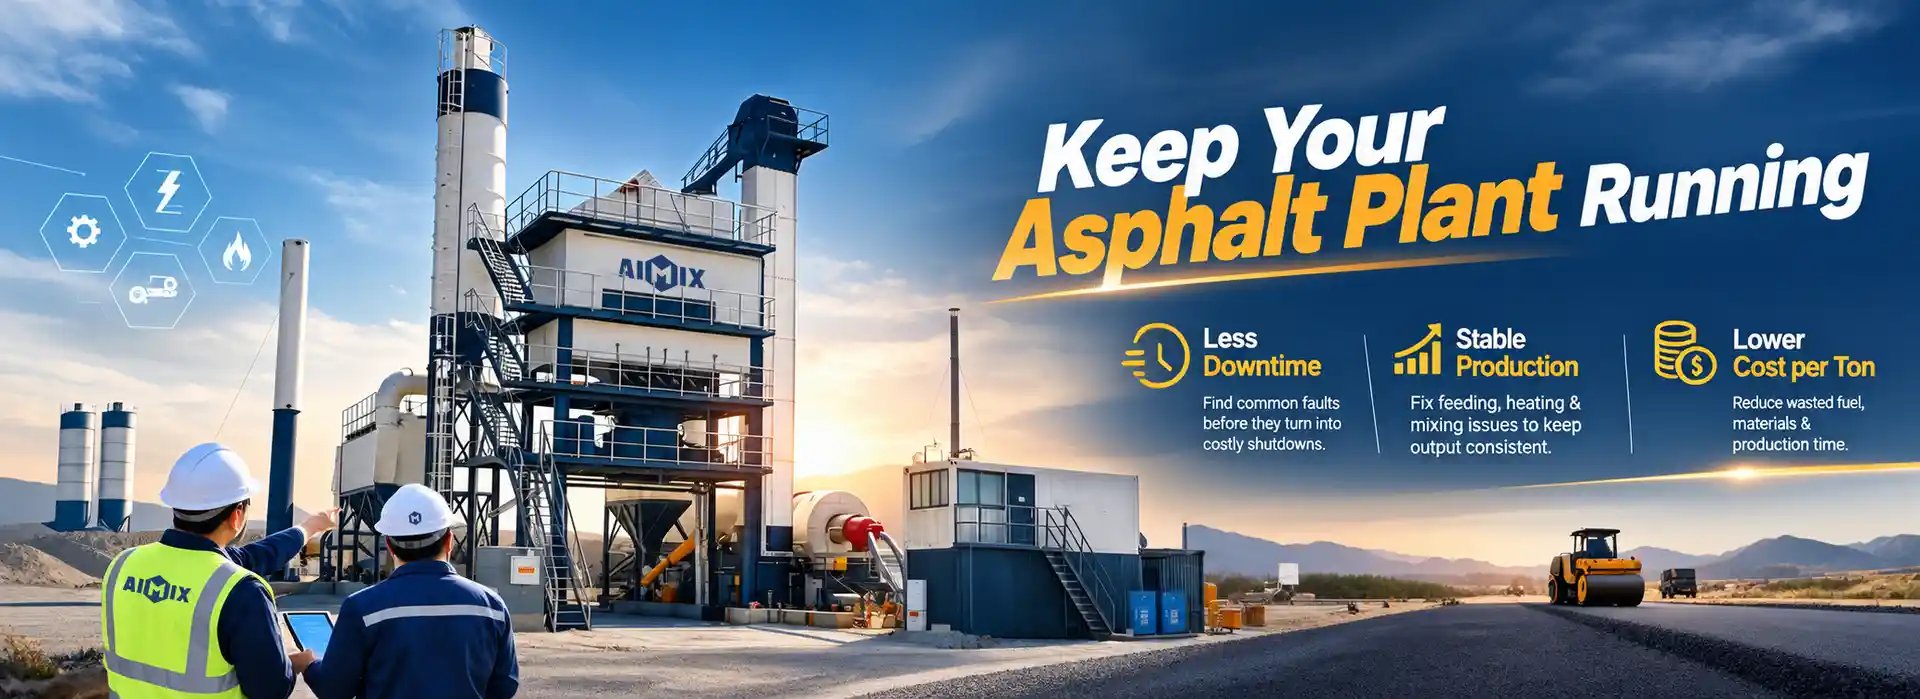
A Quick Overview of Common Asphalt Plant Problems
Common asphalt mixing plant problems can occur at almost every stage of production, from material feeding and heating to mixing, dust collection, and electrical control. The table below summarizes the most common issues, their typical symptoms, and the main areas to check before moving to detailed asphalt plant fault solutions.
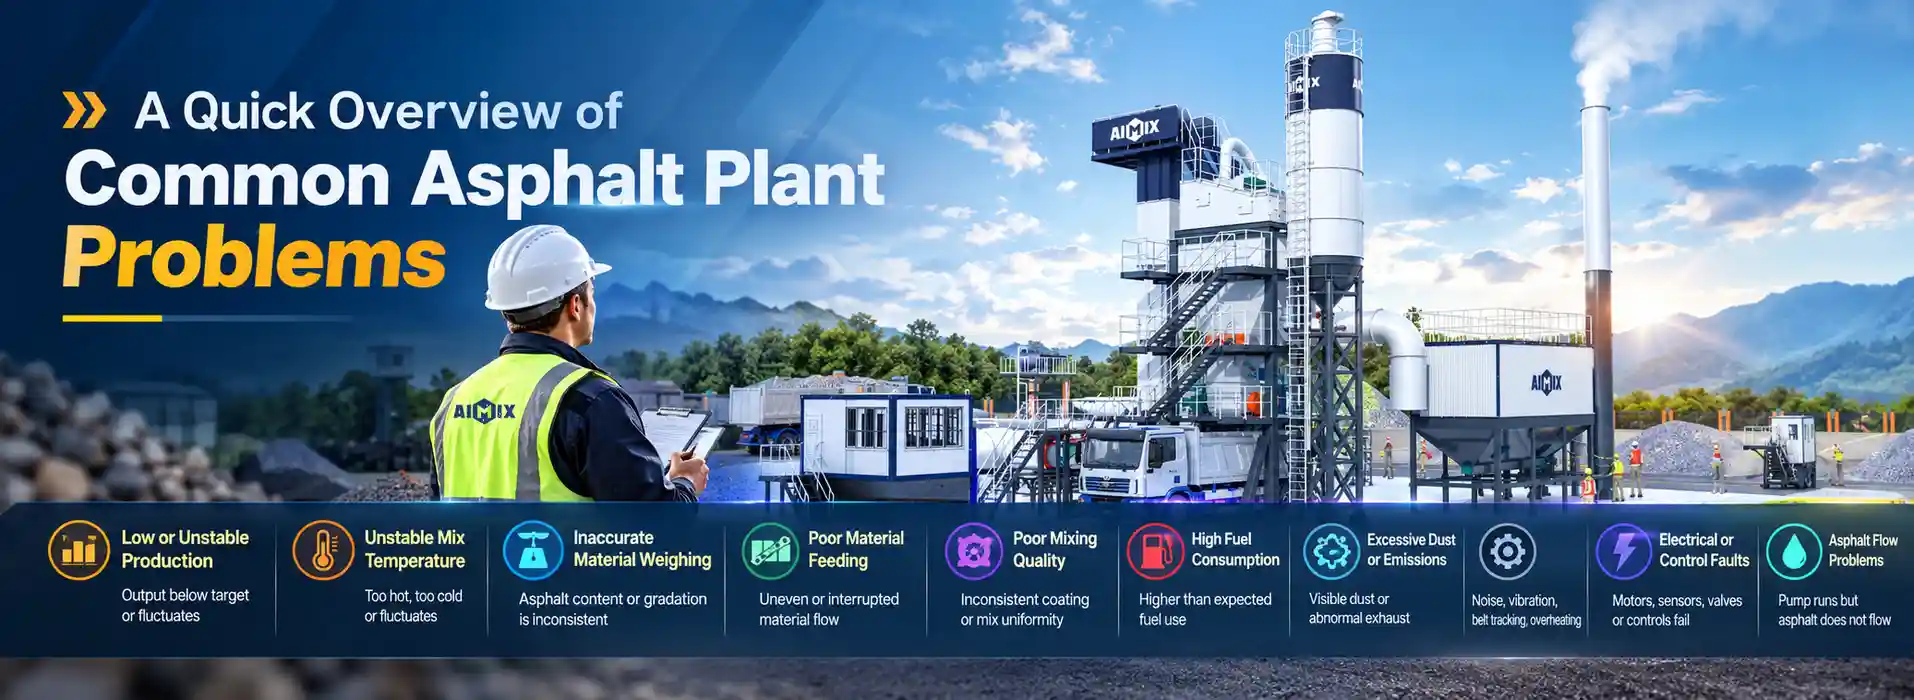
| Common Problem | Typical Symptoms | Main Areas to Check |
|---|---|---|
| Low or Unstable Production | Output is below target or fluctuates | Material feeding, moisture, dryer, mixer |
| Unstable Mix Temperature | Mix is too hot, too cold, or fluctuates | Burner, aggregate moisture, temperature sensors |
| Inaccurate Material Weighing | Asphalt content or gradation is inconsistent | Weighing system, calibration, sensors |
| Poor Material Feeding | Uneven or interrupted material flow | Feeders, belts, bins, conveyors |
| Poor Mixing Quality | Inconsistent coating or mix uniformity | Mixer, mixing time, material ratio |
| High Fuel Consumption | Fuel use is higher than expected | Burner, combustion, aggregate moisture |
| Excessive Dust or Emissions | Visible dust or abnormal exhaust | Bag filter, fan, ducts, seals |
| Mechanical Failures | Abnormal noise, vibration, belt tracking, overheating | Bearings, rollers, belts, chains |
| Electrical or Control Faults | Motors, sensors, valves, or controls fail | Power supply, wiring, switches, control system |
| Asphalt Flow Problems | Pump runs but asphalt does not flow | Pump, heating system, valves, pipelines |
Asphalt Plant Production and Material Feeding Problems
Production problems often start before the asphalt mix reaches the mixer. Unstable aggregate feeding, wet materials, blocked cold feed bins, segregation, or excessive feed rates can reduce output and affect mix consistency. Start troubleshooting from aggregate storage and feeding, then follow the material flow through the plant to identify where production is being restricted.
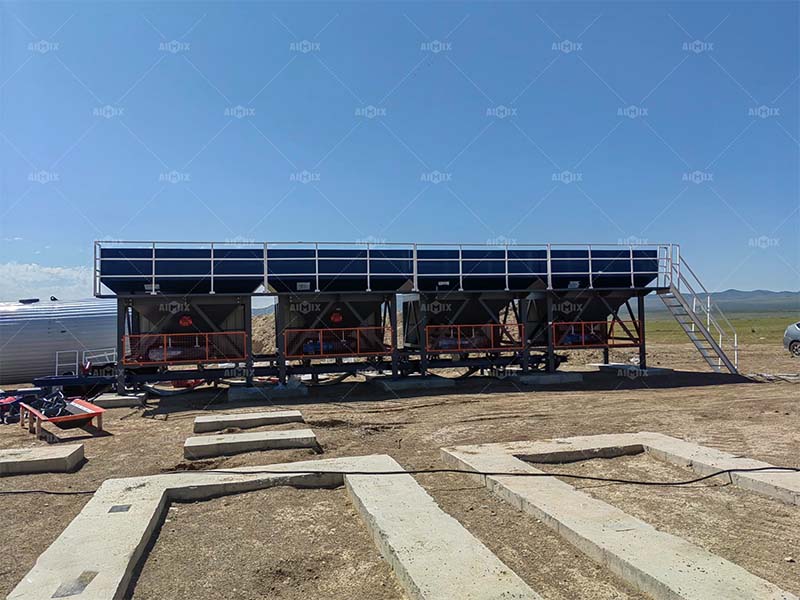
Low Production: Feed Rate, Moisture and Operating Capacity
- Symptoms: Actual output remains well below the asphalt mix plant’s rated capacity even when the plant runs continuously.
- Likely causes: High aggregate moisture, insufficient feed rate, unstable material flow, or a bottleneck in drying or material handling.
- Troubleshooting: If aggregate feeding is unstable, check the cold feeders first; if feeding is stable but output remains low, check aggregate moisture and dryer performance.
- Solution: Stabilize material feeding, improve aggregate drainage and storage, and adjust the production rate to actual operating conditions.
- Why it matters: Increasing the feed rate will not solve a downstream bottleneck and may create additional overload or quality problems.
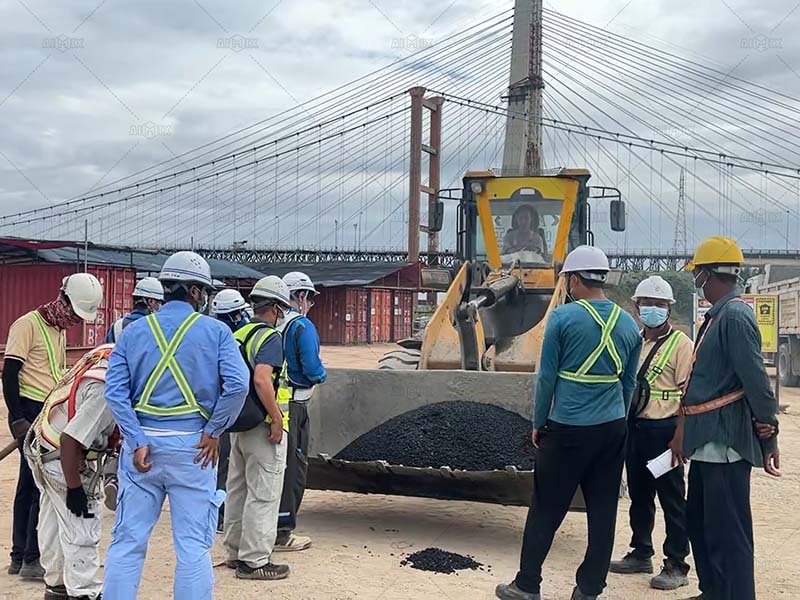
Cold Feed Bin Blockage: Material Bridging and Flow Control
- Signs: The feeder is operating, but aggregate stops flowing or comes out intermittently from the bin.
- Why it happens: Wet or sticky aggregate, material bridging above the outlet, oversized particles, or buildup around the discharge opening.
- Where to check: Inspect the bin outlet, gate, and surrounding buildup, and check whether the stored aggregate is unusually wet or compacted.
- Fix: Stop and isolate the equipment safely, remove the blockage, and improve aggregate storage and loading practices to reduce recurring bridging.
- Why it matters: A blocked bin can interrupt aggregate supply and severely reduce or stop plant production.
Unstable Aggregate Feeding: Feeder Calibration and Material Flow
- Symptoms: Aggregate feed repeatedly increases or decreases even though the feeder setting remains unchanged.
- Possible causes: Incorrect feeder calibration, inconsistent gate opening, material buildup, or irregular aggregate flow.
- Check first: Compare actual feeder output with the set value, then inspect the gate, belt, bin level, and discharge opening.
- Adjustment: Recalibrate the feeder, remove material buildup, and adjust the gate or belt speed until the feed becomes consistent.
- Why it matters: Unstable feeding affects both plant output and the aggregate proportions entering the asphalt mix.
Aggregate Segregation: Stockpile and Feeding Practices
- Signs: Coarse and fine particles are unevenly distributed, causing aggregate gradation to change during production.
- Common causes: Poor stockpile management, excessive drop height, improper loader operation, or different aggregate sizes becoming mixed.
- What to look for: Compare material from different areas of the stockpile and observe how loaders build and reclaim the pile.
- Prevention: Keep aggregate sizes separated, minimize excessive dropping and pushing, and reclaim stockpiles consistently to maintain uniform material.
- Why it matters: Segregation at the stockpile stage can carry through the plant and make consistent mix gradation difficult to maintain.
Plant Overloading: Capacity and Operating Control
- Warning signs: Increasing the feed rate causes unstable temperatures, excessive dust, incomplete drying, equipment overload, or frequent stoppages.
- Causes: Feed rate exceeding practical capacity, high aggregate moisture, or a bottleneck in the dryer, conveyor, dust collector, or mixer.
- Capacity check: Compare the feed rate with actual plant performance and identify which system becomes unstable first when production is increased.
- Corrective action: Reduce the feed rate to a stable level, correct the limiting system, and increase production only after the bottleneck has been resolved.
- Why it matters: Pushing more material through one part of the plant cannot increase useful output if another system cannot handle the additional load.
Asphalt Plant Drying, Heating and Burner Problems
Proper drying and heating are essential for maintaining asphalt mix temperature, production efficiency, and consistent material quality. When aggregate remains wet, temperatures become unstable, or the burner does not operate correctly, check the aggregate moisture, fuel supply, airflow, burner system, and dryer operation in sequence before changing temperature settings.
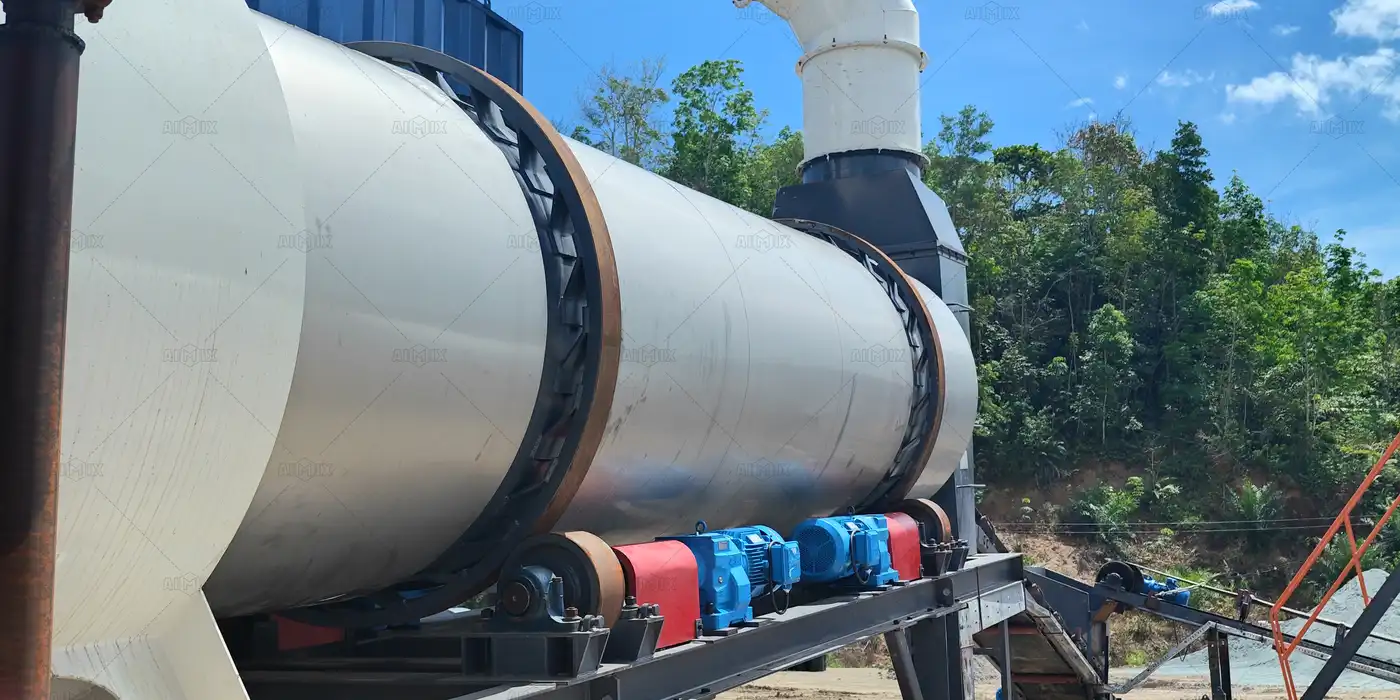
Incomplete Aggregate Drying: Moisture and Heat Control
- Symptoms: Aggregate leaves the dryer with excessive moisture, while production remains low or mix temperature is difficult to maintain.
- Likely causes: High aggregate moisture, insufficient drying time, inadequate heat transfer, excessive feed rate, or poor burner performance.
- What to check: Check aggregate moisture, dryer feed rate, burner operation, airflow, and whether material is moving normally through the dryer.
- Solution: Reduce excessive moisture at the storage stage, adjust the feed rate when necessary, and correct burner or airflow problems before increasing heat.
- Why it matters: Wet aggregate increases the drying load and can reduce production while consuming more fuel.
Low Aggregate Temperature: Burner and Heat Transfer Adjustment
- Symptoms: Aggregate temperature remains below the required production range even though the burner is operating.
- Possible causes: High moisture, insufficient fuel or heat input, poor airflow, excessive feed rate, or reduced heat transfer inside the dryer.
- Check first: Confirm aggregate moisture and feed rate, then check burner flame, fuel supply, airflow, and dryer condition.
- Adjustment: Correct the limiting factor first instead of simply increasing burner output; adjust fuel, airflow, or feed rate according to the actual operating condition.
- Why it matters: Insufficient heating can leave moisture in the aggregate and prevent the mix from reaching the required temperature.
Excessive Aggregate Temperature: Burner and Temperature Control
- Symptoms: Aggregate temperature rises above the required range or increases rapidly during operation.
- Common causes: Excessive burner output, incorrect temperature settings, low material feed, or inaccurate temperature measurement.
- What to check: Check the temperature sensor, burner output, fuel-air balance, aggregate feed rate, and actual material temperature.
- Solution: Verify the temperature reading first, then reduce heat input or correct the feed condition to bring the dryer back to a stable operating range.
- Why it matters: Excessive heating wastes fuel and may damage materials or create unnecessary thermal stress on equipment.
Burner Ignition Failure: Fuel, Air and Ignition System Checks
- Symptoms: The burner fails to ignite, repeatedly shuts down during ignition, or cannot maintain operation after startup.
- Likely causes: Insufficient fuel supply, incorrect airflow, ignition-system failure, blocked fuel components, or a control/interlock fault.
- Check first: Check the fuel supply, ignition components, air supply, relevant valves, and burner control signals according to the plant manual.
- Solution: Restore the required fuel and air supply, clean or replace faulty ignition components, and correct control or interlock faults before restarting.
- Safety: Do not repeatedly attempt ignition without identifying the cause; follow the burner manufacturer’s shutdown and restart procedure.
Unstable Burner Flame: Fuel-Air Balance and Burner Adjustment
- Symptoms: The flame fluctuates, becomes weak, changes shape unexpectedly, or repeatedly goes out during operation.
- Possible causes: Unstable fuel pressure, incorrect air supply, blocked burner components, poor ignition, or unsuitable burner adjustment.
- What to check: Check fuel supply, airflow, ignition condition, burner nozzle or relevant components, and control signals.
- Solution: Restore stable fuel and airflow first, then adjust the burner according to the manufacturer’s operating procedure rather than compensating with excessive fuel.
- Why it matters: An unstable flame can cause inconsistent heating, higher fuel use, and repeated burner shutdowns.
Poor Combustion and Excessive Smoke: Airflow and Fuel Control
- Symptoms: The burner produces abnormal smoke, an unstable flame, or visibly poor combustion during operation.
- Common causes: Incorrect fuel-air ratio, insufficient combustion air, poor fuel atomization, dirty burner components, or unsuitable fuel conditions.
- What to check: Inspect combustion air, fuel supply, burner condition, flame stability, and relevant fan or damper operation.
- Solution: Correct the fuel-air balance and clean or service the burner components according to the manufacturer’s requirements.
- Why it matters: Poor combustion wastes fuel and can increase emissions while reducing effective heat transfer.
High Fuel Consumption: Moisture, Combustion and Heat Loss
- Symptoms: Fuel consumption is noticeably higher than expected for a similar production rate.
- Likely causes: Excessive aggregate moisture, incomplete combustion, excessive air, heat loss, or operating the dryer at an unnecessarily high temperature.
- What to compare: Compare fuel use with aggregate moisture, production rate, burner condition, exhaust condition, and actual heating demand.
- Solution: Reduce moisture entering the dryer, optimize burner combustion, correct excessive airflow or heat loss, and avoid unnecessary over-heating.
- Why it matters: Fuel efficiency depends on both burner performance and how much moisture and material the dryer must process.
Dryer Drum Blockage: Feed Rate and Material Flow Control
- Symptoms: Aggregate flow through the dryer becomes restricted, material accumulates inside the drum, or the dryer stops under load.
- Common causes: Excessive feed rate, wet or sticky aggregate, oversized material, or abnormal internal material flow.
- What to check: Check the feed rate, aggregate condition, drum inlet and outlet, and signs of material accumulation or abnormal resistance.
- Solution: Stop the equipment safely, remove the accumulated material according to the maintenance procedure, and correct the feed or material condition before restarting.
- Why it matters: Continued operation with a blocked or overloaded dryer can increase mechanical load and cause further equipment damage.
Asphalt Plant Temperature Control Problems
Temperature problems can affect aggregate drying, asphalt binder flow, mixing quality, and final mix performance. When temperatures are too low, too high, or fluctuate during production, compare the readings at different stages and check the material feed, heating system, binder temperature, heat loss, and sensors before changing the burner setting.
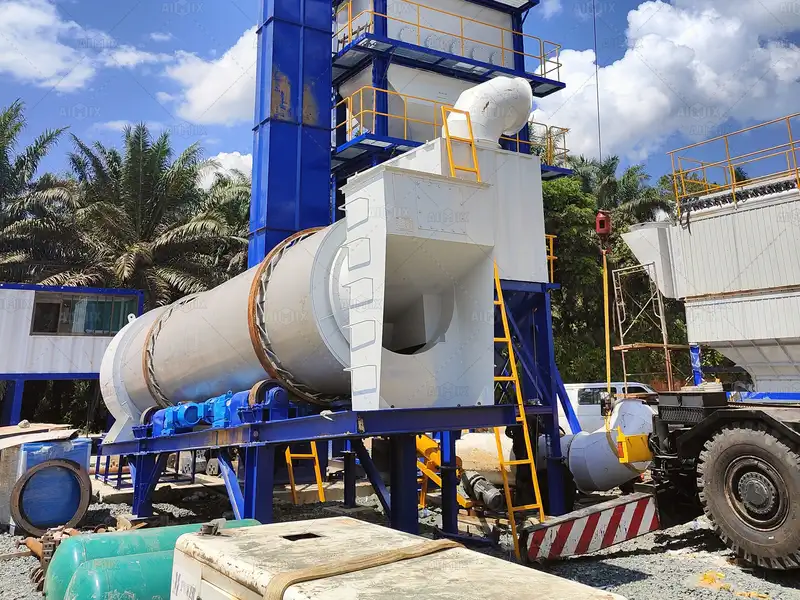
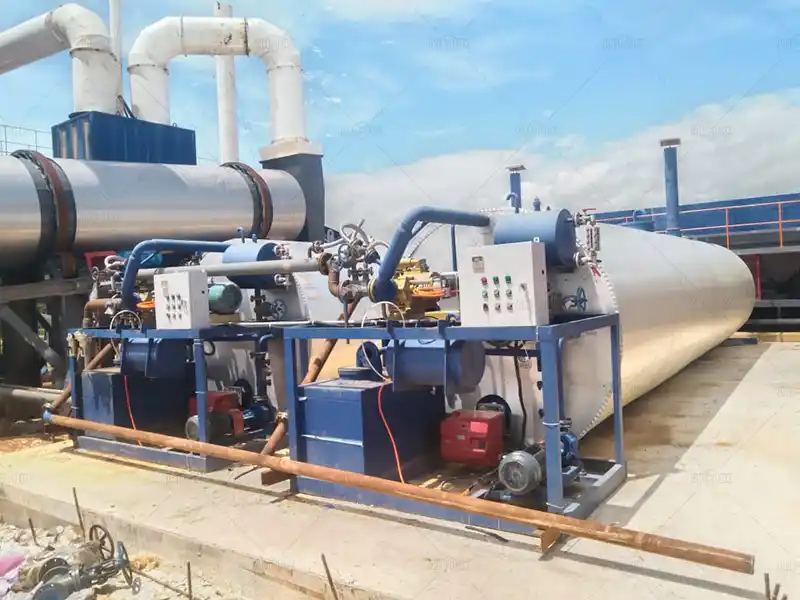
Low Mix Temperature: Heating and Material Feed Adjustment
- Symptoms: The discharged mix is below the required temperature for the selected asphalt mix or shows a noticeable temperature drop during production.
- Likely causes: Wet aggregate, insufficient heating, excessive feed rate, low binder temperature, or heat loss during transfer.
- What to check: Compare aggregate, binder, and discharge temperatures; check whether aggregate moisture or production rate has increased.
- Solution: Correct excessive moisture or unstable feeding first, then adjust heating to maintain the temperature specified by the mix design or project requirements.
- Why it matters: A large temperature deficit cannot always be corrected by increasing burner output because the actual bottleneck may be moisture or excessive throughput.
Excessive Mix Temperature: Burner and Temperature Setting Control
- Symptoms: Discharge temperature repeatedly exceeds the target range or rises significantly above the required mix temperature.
- Common causes: Excessive burner output, low material feed, incorrect temperature settings, or inaccurate temperature measurement.
- What to check: Verify the temperature with an independent measurement, then check burner output, aggregate feed rate, and heating conditions.
- Solution: Confirm the reading first, then reduce heat input or correct the feed condition to bring the mix back within the specified temperature range.
- Why it matters: Overheating increases fuel consumption and can expose asphalt binder to unnecessary thermal stress.
Unstable Discharge Temperature: Heating and Feed Balance
- Symptoms: Discharge temperature repeatedly rises and falls during continuous production, rather than remaining within a stable operating range.
- Possible causes: Fluctuating aggregate feed, changing moisture content, unstable burner output, or inconsistent binder supply.
- What to check: Compare temperature changes with feeder output, aggregate moisture, burner operation, and binder flow at the same time.
- Adjustment: Stabilize the material feed and burner operation first; avoid repeatedly changing the temperature setting to compensate for an unstable feed rate.
- Why it matters: Temperature fluctuation can indicate an upstream material-flow problem rather than a simple temperature-setting problem.
Low Asphalt Binder Temperature: Heating and Pipeline Heat Retention
- Symptoms: Binder temperature falls below the level required for reliable pumping, metering, or mixing.
- Likely causes: Insufficient tank heating, heat loss through pipelines, damaged insulation, or prolonged shutdown.
- What to check: Compare binder temperature at the tank and near the pump or injection point to identify where the temperature is being lost.
- Solution: Restore the required binder temperature gradually and repair heating or insulation problems before normal pumping resumes.
- Why it matters: A temperature drop between the tank and injection point can cause poor flow even when the storage tank temperature appears normal.
Temperature Loss During Production: Heat Transfer and Insulation
- Symptoms: Material reaches the required temperature in the heating system but is noticeably cooler at mixing or discharge.
- Common causes: Damaged insulation, exposed pipelines, cold equipment surfaces, or excessive transfer time.
- What to check: Measure temperature at key transfer points and compare the temperature drop between the heating, mixing, and discharge stages.
- Solution: Repair damaged insulation, reduce unnecessary heat-loss paths, and maintain appropriate material temperatures throughout transfer.
- Why it matters: Identifying where the temperature is lost is more effective than simply increasing the upstream heating temperature.
Incorrect Temperature Readings: Sensor and Connection Inspection
- Symptoms: The displayed temperature changes suddenly, remains fixed, or differs noticeably from an independent measurement.
- Possible causes: Sensor failure, damaged wiring, loose connections, incorrect installation, or instrument failure.
- What to check: Compare the control-panel reading with an independent measurement and inspect the sensor, wiring, and connections.
- Solution: Secure connections, repair damaged wiring, or replace the faulty sensor or instrument after confirming the source of the error.
- Why it matters: A false temperature signal can lead the burner control system or operator to make the wrong heating adjustment.
Asphalt Plant Material and Mix Quality Problems
Asphalt mix quality can change when aggregate proportions, asphalt binder content, moisture, temperature, or material distribution becomes unstable. The table below helps identify common quality problems by their visible symptoms, likely causes, and the checks or adjustments that can be made at the plant.

| Quality Problem | Typical Signs | Common Causes | Check & Fix |
|---|---|---|---|
| Incorrect Aggregate Gradation | Gradation test results fall outside the target range or change during production. | Incorrect feeder settings, unstable aggregate flow, screen problems, or segregation in stockpiles. | Check feeder output, screen condition, and aggregate samples. Recalibrate feeders and correct material-flow problems. |
| Incorrect Asphalt Binder Content | Measured binder content is consistently higher or lower than the mix design target. | Binder pump or meter calibration errors, incorrect settings, or unstable binder delivery. | Compare actual binder delivery with meter readings. Check pump and meter calibration, then correct the metering system. |
| Unstable Asphalt-Aggregate Ratio | Binder content or aggregate proportions fluctuate between batches or during continuous production. | Fluctuating aggregate feed, unstable binder flow, or poor synchronization between material streams. | Compare aggregate feed and binder delivery over the same period. Stabilize both flows and verify their synchronization. |
| Poor Aggregate Coating | Aggregate particles are not uniformly coated with asphalt binder. | Low material temperature, insufficient binder flow, inadequate mixing, or worn mixing components. | Check aggregate and binder temperatures, binder flow, mixing conditions, and mixer wear parts. Correct the identified restriction. |
| Uneven Mix Quality | Samples from the same production run show differences in gradation, binder content, or appearance. | Unstable feeding, inconsistent heating, inaccurate metering, or uneven mixing. | Compare samples from different production periods and trace the variation to feeding, heating, metering, or mixing. Stabilize the stage where the variation begins. |
| Excessive Moisture in Asphalt Mix | Aggregate remains damp after heating, or moisture-related quality problems appear in the finished mix. | High incoming aggregate moisture, insufficient drying, excessive feed rate, or poor dryer performance. | Check aggregate moisture, dryer operation, burner performance, and feed rate. Improve aggregate storage and drainage, correct drying problems, or reduce feed when necessary. |
| Finished Mix Segregation | Coarse and fine particles separate during discharge, storage, transport, or loading. | Segregated aggregate feed, excessive drop height, improper discharge, or poor material handling. | Find where segregation starts by checking the discharge, hopper, conveyor, storage, and loading process. Correct the source and minimize unnecessary material dropping or pushing. |
Practical tip: When a mix test changes unexpectedly, compare the result with the plant’s aggregate feed, binder delivery, temperature, and production records from the same period. This can help identify where the quality variation started before making major operating adjustments.
Asphalt Plant Weighing and Metering Problems
Accurate weighing and metering help maintain the designed aggregate proportions and asphalt binder content during production. When scales, meters, feeders, or discharge systems become inaccurate or unstable, the mix proportions may change even when the plant settings remain unchanged. Start by comparing the actual material output with the control-system readings, then check calibration, sensors, material flow, and mechanical conditions.
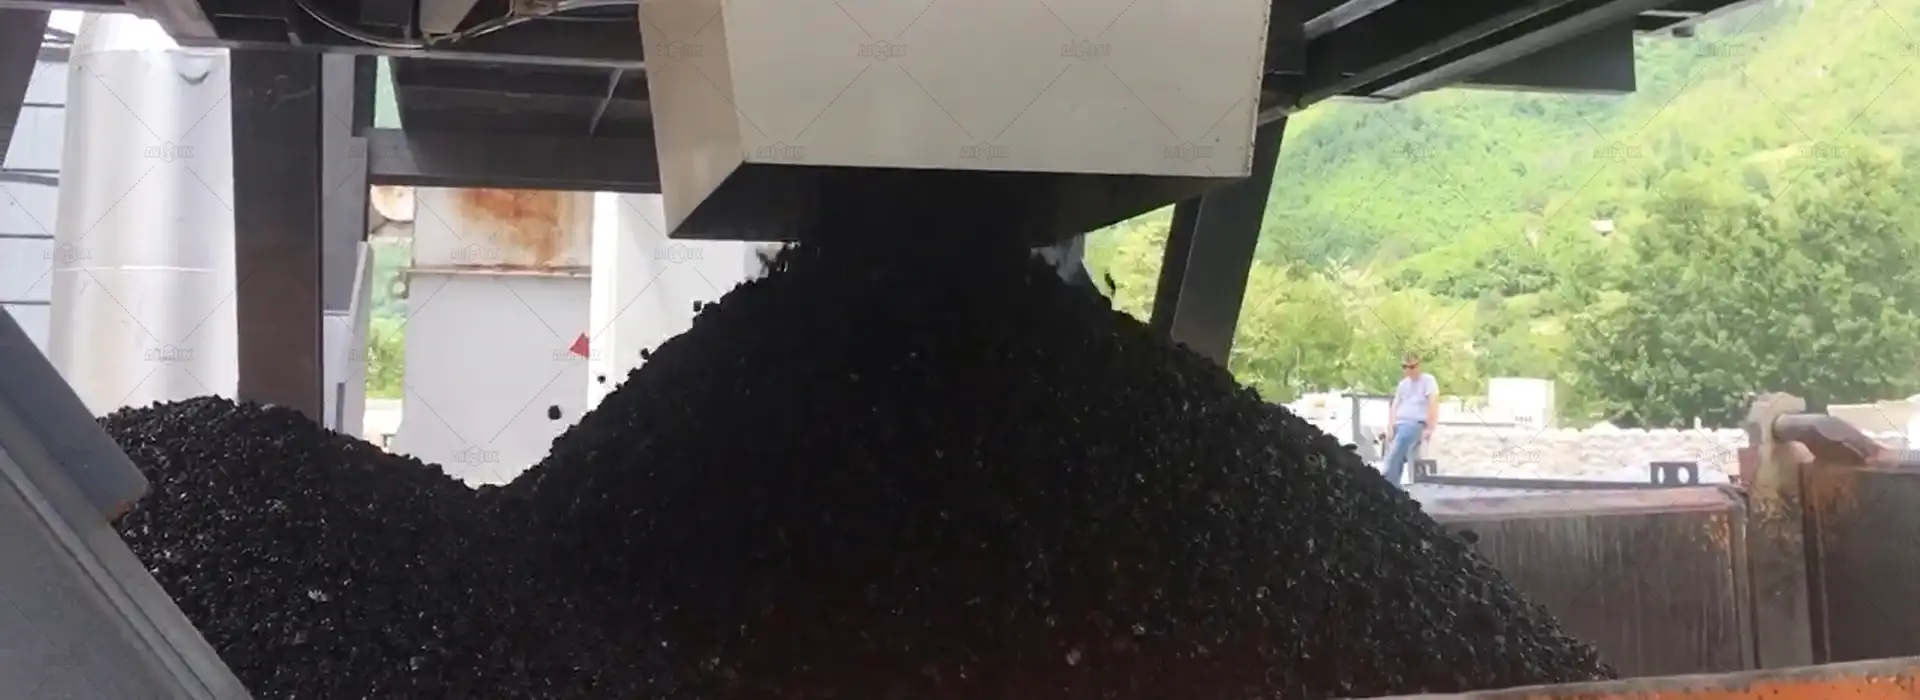
Inaccurate Aggregate Weighing: Scale Calibration and Material Flow
- Symptoms: The displayed aggregate weight does not match the actual material quantity, or repeated weighing results vary unexpectedly.
- Likely causes: Scale calibration errors, incorrect zero balance, material buildup, unstable aggregate flow, or load-cell problems.
- What to check: Inspect the weighing hopper, scale zero point, load cells, supports, material buildup, and aggregate flow.
- Solution: Remove material buildup or mechanical interference, stabilize aggregate flow, and recalibrate the scale according to the plant’s operating procedure.
Inaccurate Asphalt Metering: Pump, Meter and Calibration Checks
- Signs: Actual asphalt binder delivery does not match the meter reading or the expected production rate.
- Possible causes: Meter calibration errors, pump wear, unstable pump flow, incorrect settings, or problems in the heated asphalt pipeline.
- Check first: Compare the meter reading with actual binder delivery and inspect the pump, meter, valves, and asphalt supply line.
- Fix: Correct flow or heating problems and recalibrate the metering system before changing the binder setting.
Weighing System Errors: Calibration and Sensor Inspection
- Symptoms: Weight readings fluctuate, fail to return to zero, or show abnormal values during production.
- Common causes: Load-cell problems, loose wiring, sensor damage, mechanical interference, material buildup, or incorrect calibration.
- Where to check: Inspect load cells, sensor connections, wiring, weighing-hopper supports, and the zero reading.
- Solution: Remove mechanical interference, repair damaged connections or sensors, and recalibrate the weighing system before normal production resumes.
Incomplete Hopper Discharge: Gate and Material Flow Inspection
- Signs: Material remains in the weighing hopper after discharge or the hopper takes unusually long to empty.
- Why it happens: Material buildup, an obstructed discharge opening, insufficient gate movement, or hydraulic and mechanical problems.
- Check first: Inspect the hopper outlet, gate movement, material buildup, hydraulic system, and related mechanical components.
- Solution: Remove buildup safely, restore normal gate movement, and repair the hydraulic or mechanical problem causing incomplete discharge.
Unstable Material Metering: Feeder and Control System Adjustment
- Symptoms: Material flow repeatedly increases or decreases even though the feeder setting remains unchanged.
- Possible causes: Inconsistent material flow, feeder calibration errors, changing material characteristics, sensor problems, or unstable control signals.
- What to compare: Compare the set feed rate with actual output and check feeder speed, gate opening, material level, sensors, and control signals.
- Adjustment: Stabilize material flow, recalibrate the feeder when necessary, correct sensor or control problems, and verify actual output after adjustment.
Practical tip: When a weighing or metering value appears abnormal, verify the actual material quantity before changing the production setting. This helps distinguish a calibration or measurement problem from a real material-flow problem.
Asphalt Plant Asphalt Supply and Pump Problems
Stable asphalt binder supply is essential for consistent mixing and accurate binder content. Pump, heating, pipeline, and valve problems can interrupt asphalt flow or cause uneven binder delivery. When asphalt supply becomes abnormal, check the system from the pump and heating system to the pipeline and valves rather than adjusting the binder setting alone.
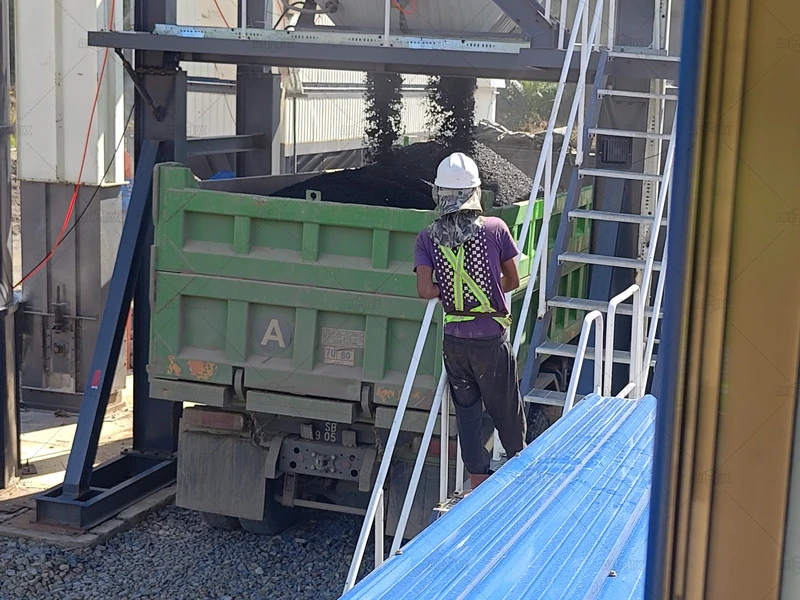
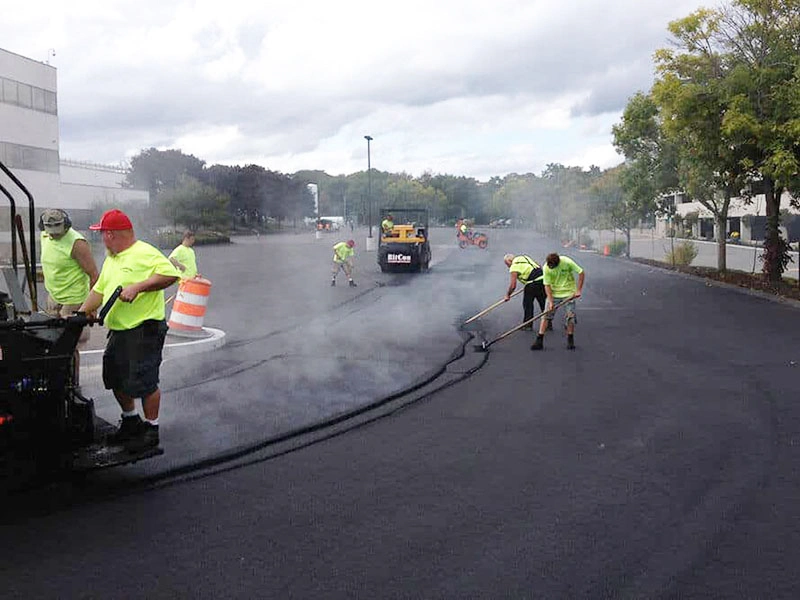
Asphalt Pump Failure: Motor, Power and Mechanical Inspection
- Symptoms: The asphalt pump does not start, stops during operation, or produces abnormal noise or current.
- Likely causes: Power or motor problems, mechanical blockage, excessive load, insufficient lubrication, or pump wear.
- What to check: Check the motor power supply, electrical protection, pump inlet and outlet, shaft rotation, bearings, and possible material blockage.
- Solution: Restore the power or control circuit, remove mechanical blockage, lubricate or replace damaged components, and confirm normal pump rotation before restarting.
Pump Runs but No Asphalt Flows: Supply, Heating and Pipeline Checks
- Signs: The pump is running but little or no asphalt binder reaches the mixing system.
- Common causes: Low asphalt level, solidified asphalt, blocked inlet or outlet lines, closed valves, or insufficient heating.
- Check first: Check the asphalt tank level, pump inlet, valves, pipeline temperature, and whether asphalt can flow through the heated section.
- Fix: Restore the asphalt supply, open the correct flow path, heat the affected section according to the equipment procedure, and clear the blockage before restarting the pump.
Blocked Asphalt Pipeline: Heating and Blockage Removal
- Symptoms: Asphalt flow decreases or stops while the pump and other components appear to be operating normally.
- Possible causes: Hardened asphalt, insufficient pipeline heating, prolonged shutdown, or buildup inside the line.
- Where to check: Trace the asphalt flow path from the pump outlet to the injection point and check heated sections, valves, elbows, and connections for restricted flow.
- Solution: Restore heating to the affected section and remove the blockage using the plant’s specified procedure. Do not force the pump against a blocked line.
Asphalt Solidification: Temperature and Pipeline Heat Control
- Signs: Asphalt becomes difficult to pump, flow becomes slow, or the system cannot deliver the required binder after shutdown.
- Why it happens: Asphalt temperature falls below the condition required for normal flow, especially during extended shutdowns or when pipeline heating is inadequate.
- What to check: Check the asphalt tank temperature, pump temperature, pipeline heating system, insulation, and operating history before the problem occurred.
- Prevention: Maintain the required operating temperature, keep heated lines and valves in suitable condition, and follow the manufacturer’s shutdown and restart procedure.
Asphalt Valve Failure: Valve and Control System Inspection
- Symptoms: A valve does not open or close correctly, asphalt flow is restricted, or the system shows an abnormal flow condition.
- Likely causes: Hardened asphalt around the valve, mechanical damage, actuator problems, insufficient hydraulic or electrical control, or incorrect valve position.
- Check first: Inspect valve movement, actuator or control signal, connections, heating condition, and material buildup around the valve.
- Solution: Restore the valve’s heating and movement, remove buildup safely, repair the actuator or control system, and verify valve operation before production resumes.
Asphalt Leakage: Pipeline, Valve and Connection Inspection
- Signs: Asphalt is visible around pipelines, valves, pump connections, flanges, or joints.
- Common causes: Loose connections, damaged seals, worn valves, cracked pipelines, excessive pressure, or thermal damage.
- Check first: Identify the exact leakage point and inspect nearby flanges, seals, valves, pipeline joints, and supports.
- Solution: Stop the affected system safely, isolate the source where required, allow hot components to reach a safe condition, and repair or replace the damaged component before restarting.
Safety Warning: Flammable Liquid Contamination in the Asphalt System
Never allow diesel or other flammable liquids to remain in an asphalt pipeline or pump system when asphalt is being heated or introduced. Flammable-liquid residue can create a serious fire or explosion hazard when exposed to high temperatures. Before restarting the asphalt system after cleaning or maintenance, confirm that the relevant lines and components are correctly prepared according to the manufacturer’s safety procedure.
Quick troubleshooting: When asphalt flow is abnormal, follow the flow path in order: asphalt tank → heating system → pump → valve → pipeline → injection point. This helps determine whether the restriction is caused by supply, temperature, mechanical blockage, or flow-control components.
Asphalt Plant Mixing and Discharge Problems
The mixing and discharge stages determine whether heated aggregates and asphalt binder are combined uniformly and transferred from the plant without interruption. Problems with mixer loading, mixing conditions, wear parts, or discharge gates can lead to inconsistent mix quality, abnormal equipment operation, or production delays. Check the material load, mixer condition, and discharge system together before changing the mix settings.
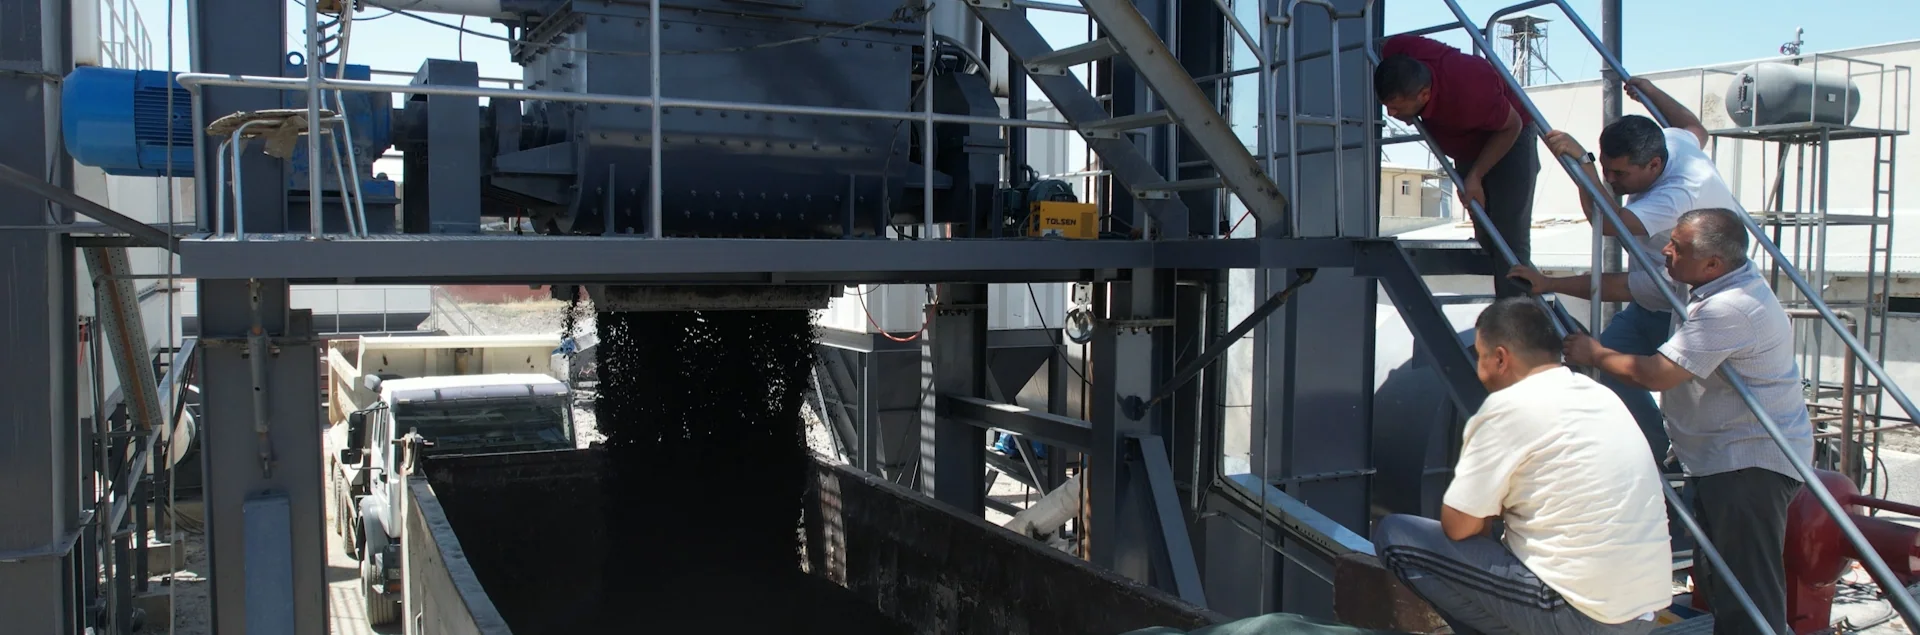
 Mixer Overload: Feed Rate and Mechanical Load Control
- Symptoms: The mixer motor draws excessive current, trips the overload protection, slows down, or the mixer becomes difficult to start.
- Likely causes: Excessive material feed, material buildup, foreign material, or excessive mechanical resistance from the mixer.
- What to check: Check the actual feed rate, mixer load, material accumulation, mixer shaft, blades, and discharge opening.
- Solution: Reduce the material load, clear the source of blockage safely, and inspect the mixer components before returning to normal production.
 Incomplete Mixing: Mixing Time and Material Distribution
- Signs: Aggregate and asphalt binder are not uniformly distributed, or the finished mix shows visible differences within the same batch.
- Common causes: Insufficient mixing time, incorrect material loading sequence, uneven material distribution, or restricted mixer performance.
- Check first: Check the mixing cycle, aggregate and binder entry, batch size, mixer loading condition, and discharge timing.
- Fix: Restore the required mixing cycle and material sequence, correct loading problems, and verify the mix uniformity after adjustment.
 Uneven Mixing: Temperature, Feed and Mixer Conditions
- Symptoms: Mix appearance or test results vary between batches even though the mix design remains unchanged.
- Possible causes: Uneven material temperatures, unstable aggregate or binder feeding, inconsistent batch conditions, or mixer performance problems.
- What to compare: Compare material temperatures, feed quantities, batch size, mixing conditions, and samples from different production periods.
- Solution: Stabilize material feeding and temperature, correct abnormal batch conditions, and inspect the mixer if variation continues.
 Worn Mixing Components: Blade and Wear-Part Inspection
- Signs: Mixing quality gradually deteriorates, mixing takes longer, or the mixer requires more power to maintain normal operation.
- Why it happens: Mixer blades, paddles, liners, or other wear parts become worn after extended operation.
- Where to check: Inspect blade and paddle condition, wear patterns, clearances, liners, and mounting hardware during scheduled maintenance.
- Solution: Replace components that have reached their service limits and restore the recommended clearances and installation condition.
Abnormal Mixer Noise: Blade, Bearing and Foreign-Material Inspection
- Symptoms: The mixer produces unusual knocking, grinding, or rattling sounds during operation.
- Likely causes: Foreign material inside the mixer, loose or damaged blades, bearing problems, insufficient lubrication, or mechanical interference.
- Check first: Stop the equipment safely and inspect the mixer chamber, blades, shaft, bearings, fasteners, and lubrication condition.
- Solution: Remove foreign material, tighten or replace damaged components, lubricate where required, and confirm normal operation before restarting.
Discharge Gate Problems: Gate Mechanism and Material Buildup
- Signs: The discharge gate does not open or close completely, material remains in the mixer, or discharge becomes slow or uneven.
- Common causes: Material buildup around the gate, mechanical obstruction, hydraulic problems, or incorrect gate adjustment.
- What to check: Inspect the gate opening, buildup around the discharge area, hydraulic or drive components, hinges, and limit switches where fitted.
- Solution: Remove material buildup safely, restore gate movement, correct the hydraulic or mechanical problem, and verify complete discharge before normal production.
Quick troubleshooting: If mixing quality and discharge performance change at the same time, check the mixer load and discharge condition first. A restricted discharge can increase the material load inside the mixer and create secondary mixing or motor problems.
Asphalt Plant Dust Collection and Emission Problems
The dust collection system controls fine particles generated during aggregate drying, heating, and material handling. Problems with airflow, filter bags, ducting, induced draft fans, or dust return can increase emissions, reduce collection efficiency, and affect plant operation. When dust levels become abnormal, check the airflow path and dust collection components together rather than adjusting the system blindly.
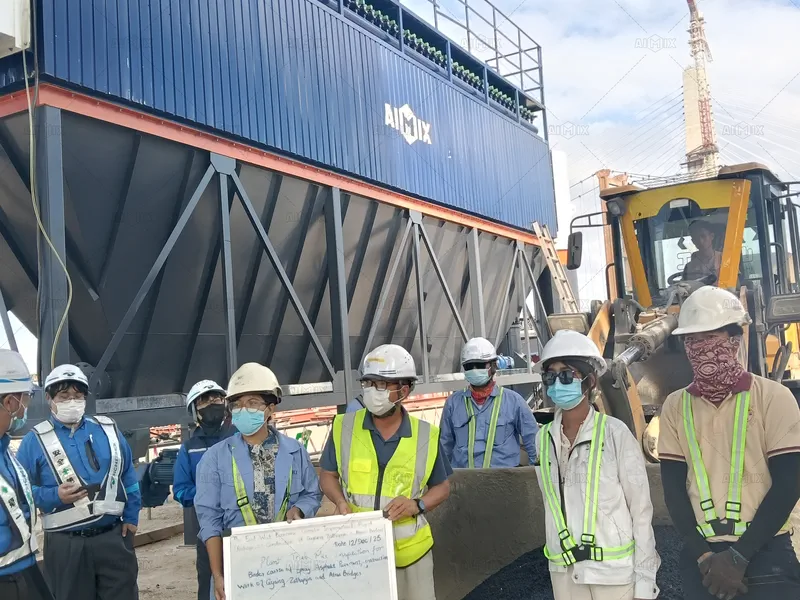
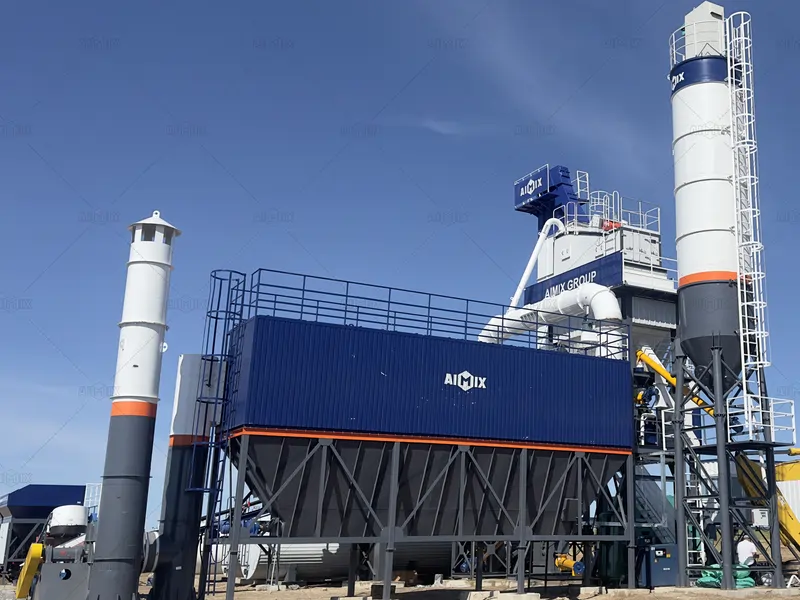
Excessive Dust Emissions: Airflow and Dust Collection Control
- Symptoms: Visible dust escapes from the stack or around the plant, or dust emissions increase noticeably during production.
- Likely causes: Insufficient airflow, damaged filter bags, air leakage, excessive dust loading, or abnormal operation of the induced draft fan.
- What to check: Inspect filter bags, ducts, seals, fan operation, pressure conditions, and possible air leakage throughout the dust collection system.
- Solution: Restore proper airflow, repair leakage, clean or replace damaged filters, and correct the fan or dust-loading problem causing excessive emissions.
High Baghouse Pressure: Filter and Airflow Inspection
- Signs: Baghouse pressure remains higher than normal and the plant experiences reduced airflow or unstable dust collection.
- Common causes: Dust-loaded filter bags, ineffective filter cleaning, excessive moisture, blocked ducts, or restricted airflow.
- Check first: Check filter bag condition, cleaning system operation, dust accumulation, ducting, and induced draft fan performance.
- Fix: Restore effective filter cleaning, remove accumulated dust or airflow restrictions, and replace filters when they are damaged or no longer suitable for normal operation.
Blocked or Damaged Filter Bags: Cleaning and Replacement
- Symptoms: Dust collection efficiency decreases, pressure across the baghouse increases, or dust appears downstream of the filters.
- Why it happens: Excessive dust accumulation, moisture, improper cleaning, filter damage, or long-term wear can restrict or compromise the filter bags.
- Where to check: Inspect the filter bags, bag cages, cleaning system, sealing areas, and dust accumulation inside the baghouse.
- Solution: Clean the filters using the specified cleaning method, correct the condition causing excessive dust loading, and replace damaged or severely worn bags.
Dust Leakage: Duct, Seal and Connection Inspection
- Signs: Dust escapes from duct joints, inspection doors, flanges, baghouse connections, or other points in the collection system.
- Possible causes: Loose connections, damaged seals, cracked ducts, poor access-door sealing, or excessive negative-pressure imbalance.
- What to check: Inspect duct joints, flanges, doors, seals, expansion sections, and other connection points for visible dust leakage.
- Solution: Tighten loose connections, replace damaged seals, repair duct damage, and restore proper system airflow after the leakage has been corrected.
Induced Draft Fan Problems: Fan, Bearing and Airflow Inspection
- Symptoms: Dust collection becomes weak, airflow is unstable, the fan produces abnormal noise, or the fan motor shows abnormal operating conditions.
- Likely causes: Fan imbalance, bearing problems, excessive dust buildup, mechanical damage, blocked airflow, or drive-system problems.
- Check first: Inspect fan rotation, impeller condition, bearings, drive components, airflow path, and dust accumulation around the fan.
- Solution: Remove accumulated material where appropriate, correct mechanical problems, service damaged bearings or drive components, and verify stable airflow before returning to normal production.
Unstable Dust Return: Material Flow and Collection System Control
- Signs: Collected dust does not return steadily to the intended material stream, or dust accumulation and discharge vary during production.
- Common causes: Blocked return lines, excessive dust buildup, unstable conveying conditions, incorrect valve position, or problems with the dust return system.
- What to check: Check the dust discharge point, return line, valves, conveying components, material buildup, and control signals where applicable.
- Solution: Clear the restriction safely, restore normal material flow, correct valve or conveying problems, and verify stable dust return during continuous operation.
Quick troubleshooting: If dust emissions increase suddenly, check the system in the direction of airflow: dryer and dust source → ducting → induced draft fan → baghouse → clean-air outlet. This helps determine whether the problem is caused by airflow, filtration, leakage, or fan performance.
Asphalt Plant Mechanical Problems
Mechanical problems can affect material feeding, conveying, drying, mixing, and discharge throughout an asphalt plant. Belt misalignment, excessive vibration, bearing problems, loose connections, and hydraulic failures may reduce production efficiency or lead to equipment damage if ignored. When a mechanical problem occurs, identify the affected component first, then check its load, alignment, lubrication, connections, and operating condition.

Conveyor Belt Misalignment: Roller and Belt Adjustment
- Symptoms: The conveyor belt moves toward one side, rubs against the frame, or repeatedly runs out of its normal position during operation.
- Likely causes: Misaligned rollers, uneven belt tension, material buildup, an incorrectly positioned belt splice, or uneven material loading.
- What to check: Inspect the drive and return rollers, belt tension, belt splice, support frame, and any material buildup around the conveyor.
- Solution: Clean the affected area, correct roller alignment and belt tension, and adjust the belt gradually until it runs centrally under normal load.
Conveyor Belt Slippage: Tension and Material Load Control
- Signs: The drive pulley rotates but the belt moves slowly, stops, or fails to maintain the required conveying speed.
- Common causes: Insufficient belt tension, excessive material loading, material buildup on the pulley, worn belt surfaces, or drive-system problems.
- Check first: Check belt tension, material load, drive pulley condition, belt surface, and the motor or drive components.
- Fix: Restore suitable belt tension, remove material buildup, reduce excessive loading, and repair worn or damaged drive components as required.
Belt Cleaner Blockage: Cleaning and Wear Inspection
- Symptoms: Material accumulates around the belt cleaner, the cleaner does not rotate or move correctly, or material returns along the conveyor.
- Why it happens: Foreign material, hardened material buildup, excessive wear, or incorrect cleaner adjustment can restrict normal operation.
- Where to check: Inspect the cleaner, scraper or cleaning surface, mounting points, surrounding conveyor area, and accumulated material.
- Solution: Remove the obstruction safely, clean the affected area, and replace or adjust worn cleaning components so that they operate correctly without damaging the belt.
Bucket Elevator Problems: Chain, Sprocket and Material Inspection
- Symptoms: The bucket elevator produces abnormal noise, conveys material unevenly, or shows reduced lifting performance.
- Likely causes: Foreign material, loose or excessively tight chains, worn sprockets, damaged buckets, insufficient lubrication, or material buildup.
- What to inspect: Check the chain, sprockets, buckets, bearings, lubrication points, and material accumulation inside the elevator.
- Solution: Remove accumulated material, restore proper chain condition and tension, lubricate where required, and replace severely worn or damaged components.
Bearing Overheating: Lubrication and Bearing Condition
- Signs: A bearing housing becomes unusually hot, produces abnormal noise, or shows increasing vibration during operation.
- Possible causes: Insufficient lubrication, excessive load, bearing wear, misalignment, contamination, or improper installation.
- Check first: Check lubrication condition, bearing temperature, shaft alignment, load condition, mounting, and signs of wear or damage.
- Solution: Correct lubrication problems, remove abnormal mechanical loads, realign components when necessary, and replace damaged bearings before continued operation causes further damage.
Excessive Equipment Vibration: Alignment and Mechanical Inspection
- Symptoms: Equipment vibrates more than normal, produces unusual noise, or shows movement around its supports during operation.
- Common causes: Misalignment, loose fasteners, worn bearings, unbalanced rotating components, foreign material, or structural problems.
- What to check: Inspect shafts, bearings, rotating components, mounting points, fasteners, supports, and nearby components for abnormal movement or wear.
- Solution: Stop the affected equipment when vibration is severe, identify the mechanical source, then correct alignment, tighten connections, remove foreign material, or replace damaged components as required.
Loose Bolts and Connections: Fastener Inspection and Maintenance
- Signs: Unusual rattling, component movement, abnormal vibration, or visible gaps appear around equipment connections.
- Why it happens: Continuous vibration, installation errors, insufficient tightening, or long-term mechanical fatigue can loosen fasteners.
- Where to check: Inspect equipment frames, conveyor supports, mixer components, guards, bearing housings, structural connections, and other vibration-prone areas.
- Solution: Tighten loose fasteners according to the equipment requirements, replace damaged hardware, and inspect the surrounding components for secondary damage.
Hydraulic Gate Problems: Pressure, Valve and Mechanical Inspection
- Symptoms: A hydraulic gate opens slowly, fails to open or close completely, moves unevenly, or cannot maintain its normal position.
- Likely causes: Insufficient hydraulic pressure, valve problems, hydraulic leakage, restricted lines, mechanical obstruction, or damaged cylinders.
- What to check: Inspect hydraulic pressure, hoses and connections, valves, cylinders, gate movement, and material buildup around the gate.
- Solution: Correct hydraulic leakage or pressure problems, restore valve operation, remove mechanical obstruction safely, and repair or replace damaged hydraulic components before returning the gate to normal service.
Quick troubleshooting: For a sudden mechanical fault, first determine whether the problem is caused by excessive load, material blockage, misalignment, lubrication, or component wear. If abnormal noise, overheating, or severe vibration occurs, stop the affected equipment and inspect the mechanical system before continuing production.
Asphalt Plant Electrical and Control Problems
Electrical and control systems coordinate material feeding, heating, mixing, conveying, and safety functions throughout an asphalt mix plant. Power interruptions, motor faults, sensor failures, or control-system problems can stop production or cause equipment to operate abnormally. When an electrical fault occurs, check the power supply, control circuit, sensors, and connected equipment in sequence rather than repeatedly restarting the asphalt mix plant.
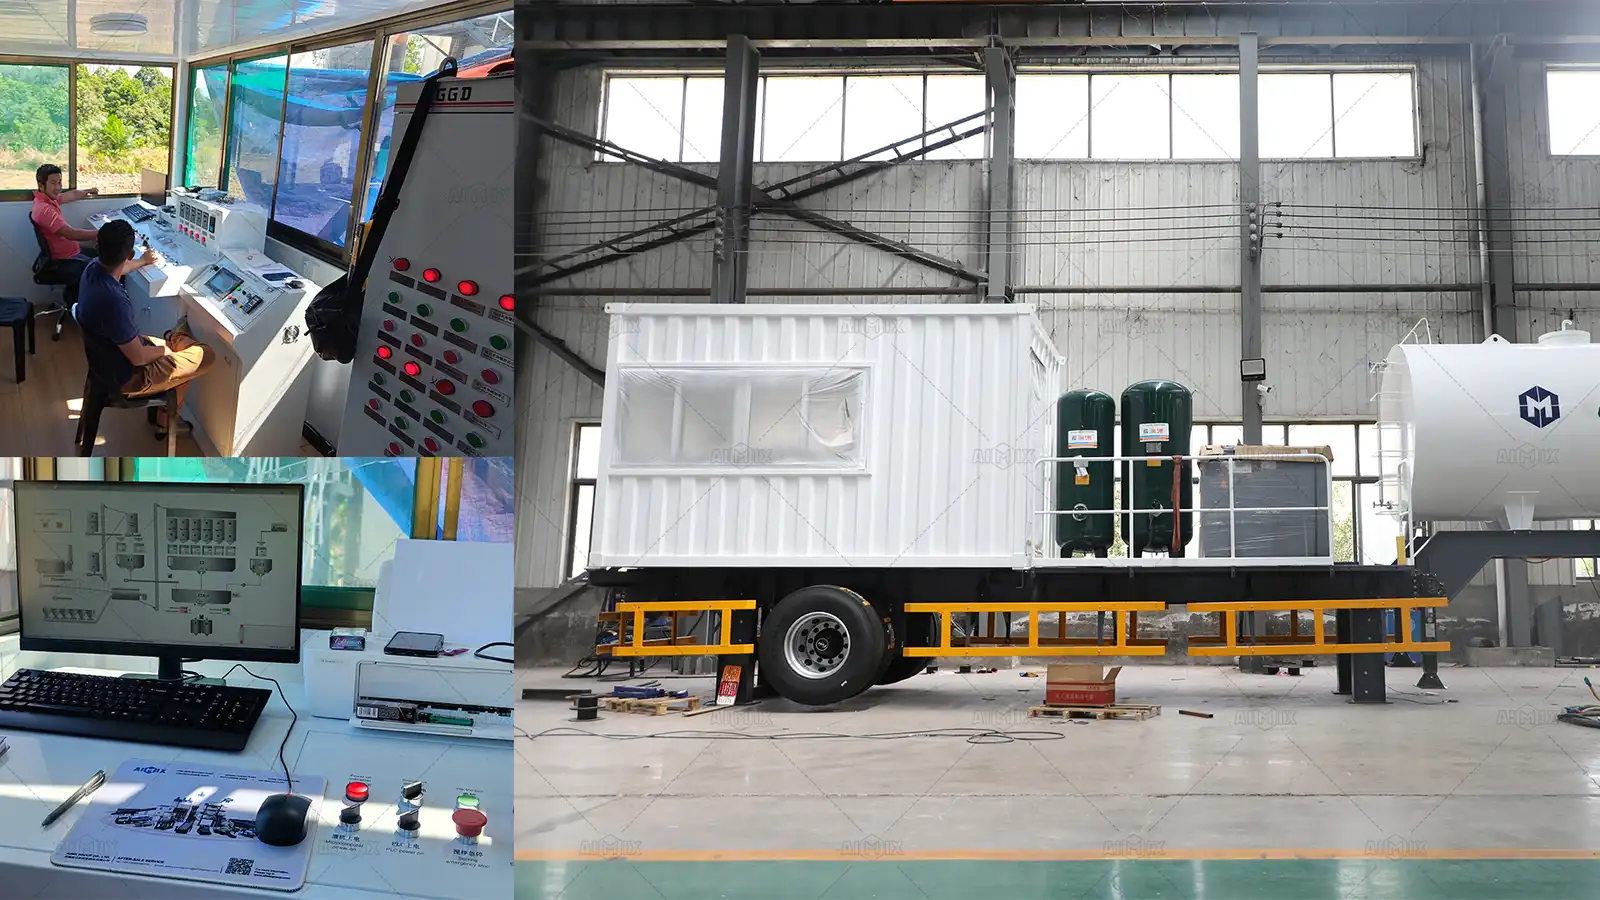
Power Supply Failure: Electrical Connections and Power Source Inspection
- Symptoms: The control system has no power, the display does not turn on, or multiple asphalt plant components stop operating at the same time.
- Likely causes: Power outage, abnormal incoming power, phase loss, loose electrical connections, or a problem with the generator, transformer, or main power system.
- What to check: Check the incoming power source, main electrical connections, breakers, phase condition, and generator or transformer where applicable.
- Solution: Restore a stable power supply, correct loose or damaged connections, and have qualified personnel inspect the electrical system if the power abnormality continues.
Control Panel Failure: Control Circuit and Fuse Inspection
- Signs: The control panel cannot start normally, some controls do not respond, or part of the control system loses power.
- Common causes: Control-circuit faults, blown fuses, loose wiring, damaged switches, overload protection, or component failure inside the control system.
- Check first: Inspect the relevant control-circuit protection, fuses, switches, wiring connections, and control components for visible faults or abnormal conditions.
- Fix: Restore the affected control circuit, replace damaged protection components with the correct specification, and repair the underlying fault before returning the panel to normal operation.
Motor Starting Problems: Circuit, Contactor and Mechanical Checks
- Symptoms: A motor does not start, starts intermittently, trips immediately, or produces an abnormal sound when starting.
- Possible causes: Power or control-circuit problems, contactor or thermal-protection faults, loose wiring, phase loss, or excessive mechanical resistance.
- What to inspect: Check the motor power supply, control circuit, contactor, protection devices, wiring connections, and the connected mechanical equipment.
- Solution: Correct the electrical or control fault and remove any mechanical obstruction or excessive load before restarting the motor.
Motor Overload and Overheating: Load and Motor Inspection
- Signs: The motor draws abnormal current, overheats, trips protection, slows down, or stops during production.
- Likely causes: Excessive mechanical load, material blockage, bearing problems, poor ventilation, electrical abnormalities, or motor damage.
- Check first: Check the connected equipment for blockage or excessive resistance, then inspect the motor, bearings, cooling condition, power supply, and protection system.
- Solution: Remove the source of excessive load, correct mechanical or electrical problems, and allow the motor to return to a suitable operating condition before restarting.
Emergency Stop Failure: Switch and Control Circuit Inspection
- Symptoms: The emergency stop switch does not respond correctly, equipment continues operating when an emergency stop is activated, or the plant cannot reset after an emergency stop.
- Common causes: Damaged switch contacts, loose wiring, control-circuit faults, or problems with the emergency-stop circuit.
- What to check: Inspect the emergency-stop switches, wiring connections, control circuit, and related safety components.
- Solution: Repair or replace faulty safety components and verify that the emergency-stop function works correctly before normal production resumes.
Sensor Signal Problems: Wiring, Sensors and Control System Checks
- Signs: The control system displays abnormal values, a process value remains unchanged, or automatic control does not respond correctly.
- Possible causes: Sensor damage, loose connectors, wiring faults, poor sensor installation, or problems with the control-system input.
- Where to check: Inspect the sensor, connector, wiring, installation position, and corresponding control-system signal.
- Solution: Restore secure connections, replace damaged sensors or wiring where necessary, and verify the signal against the actual equipment condition before resuming automatic operation.
Solenoid Valve Failure: Power, Coil and Valve Inspection
- Symptoms: A pneumatic or hydraulic solenoid valve does not actuate, remains open or closed, or the connected actuator does not respond to the control signal.
- Likely causes: No electrical signal, damaged solenoid coil, loose connector, valve-core blockage, or a control-system problem.
- Check first: Check the control signal, electrical connection, solenoid coil, valve condition, and the connected hydraulic or pneumatic system.
- Solution: Restore the control signal or connection, replace a failed coil or valve when required, and clear the source of mechanical blockage before testing the actuator again.
Limit Switch Failure: Switch Position and Wiring Inspection
- Signs: A gate, conveyor, or other moving component reaches its position but the control system does not detect it correctly.
- Common causes: Incorrect switch position, damaged limit switch, loose wiring, mechanical interference, or a failed control signal.
- What to inspect: Check the switch position, actuator contact point, wiring, connectors, and corresponding input signal on the control system.
- Solution: Correct the switch position, remove mechanical interference, repair damaged connections, or replace the faulty switch and verify the position feedback before operation.
False Alarms: Sensor, Wiring and Control Signal Inspection
- Symptoms: The control system reports an alarm even though the equipment appears to be operating normally, or alarms appear and disappear repeatedly.
- Possible causes: Incorrect sensor signals, damaged limit switches, loose wiring, unstable connections, or control-system configuration problems.
- What to check: Compare the alarm signal with the actual equipment condition and inspect the related sensors, switches, wiring, connectors, and control inputs.
- Solution: Correct the faulty signal source, repair wiring or replace damaged components, and confirm that the alarm disappears under normal operating conditions.
Quick troubleshooting: When several components stop at the same time, check the power supply and main control circuit first. If only one component is affected, trace its individual motor, sensor, switch, or control circuit before investigating the wider plant electrical system.
Asphalt Plant Installation, Relocation and Operation Problems
Problems can occur when an asphalt plant is installed, relocated, connected, or operated with incorrect settings. Poor positioning, an unsuitable foundation, loose connections, or incorrect production parameters may affect equipment stability, material flow, and overall plant performance. After installation or relocation, check the hot mix plant systematically and confirm each major system before returning to full production.

Equipment Misalignment: Installation and Positioning Adjustment
- Symptoms: Conveyors run unevenly, rotating components produce abnormal noise, or connected equipment does not operate smoothly after installation.
- Likely causes: Incorrect equipment positioning, inaccurate centerlines, uneven supports, installation deviations, or misalignment between connected components.
- What to check: Check equipment positions, centerlines, support levels, conveyor alignment, rotating shafts, and the connection between adjacent components.
- Solution: Correct the equipment position and alignment according to the installation requirements, then run the affected system without load to confirm smooth operation before production.
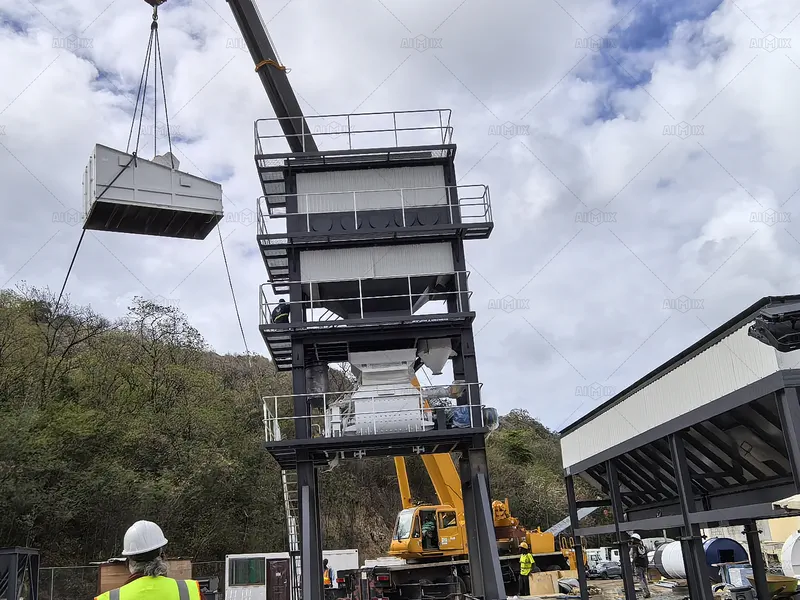
Foundation and Site Problems: Level, Stability and Installation Conditions
- Signs: Equipment settles unevenly, structural components move abnormally, or alignment changes after the plant begins operating.
- Common causes: An unsuitable foundation, inadequate site preparation, uneven supporting surfaces, poor drainage, or insufficient stability for the equipment load.
- Check first: Inspect foundation level and condition, equipment supports, anchor locations, drainage, and any visible settlement or structural movement.
- Fix: Correct site or foundation deficiencies before continued operation and realign affected equipment after the supporting condition has been restored.
Loose Mechanical Connections: Installation and Fastener Inspection
- Symptoms: Abnormal vibration, rattling, component movement, or changes in equipment alignment appear shortly after installation or commissioning.
- Why it happens: Fasteners may not have been tightened correctly, installation connections may have been missed, or vibration during initial operation may loosen mechanical joints.
- Where to check: Inspect structural connections, equipment supports, conveyor assemblies, bearing housings, guards, and other installation fasteners.
- Solution: Tighten or replace affected fasteners according to the equipment requirements and inspect nearby components for damage or secondary alignment problems.
Electrical Connection Problems: Wiring and Power System Checks
- Signs: Motors fail to start, sensors give abnormal signals, control components do not respond, or different systems lose power after installation.
- Possible causes: Incorrect wiring, loose terminals, incorrect connection sequence, unsuitable power supply, or damaged cables or electrical components.
- What to check: Verify wiring against the plant electrical documentation and inspect terminals, connectors, power supply, protective devices, and control-system connections.
- Solution: Correct wiring or connection problems, restore the required power supply, and have qualified electrical personnel verify the system before commissioning.
Hydraulic Connection Problems: Lines, Pressure and Valve Inspection
- Symptoms: Hydraulic gates or actuators move slowly, fail to reach their positions, or operate inconsistently after installation or reconnection.
- Likely causes: Incorrect hydraulic connections, leakage, air or blockage in the system, insufficient pressure, or incorrectly positioned valves.
- Check first: Inspect hydraulic lines, fittings, valves, cylinders, connections, leakage points, and the pressure condition of the system.
- Solution: Correct connection or leakage problems, restore the required hydraulic condition, and verify smooth actuator movement before normal production.
Post-Relocation Problems: Alignment, Connections and Recommissioning
- Symptoms: Equipment that operated normally before relocation develops vibration, material-flow problems, electrical faults, or abnormal component movement after reassembly.
- Common causes: Changes in equipment alignment, incomplete reconnection, damaged components during transport, loose fasteners, or insufficient commissioning after relocation.
- What to inspect: Check structural alignment, mechanical connections, belts and conveyors, electrical and hydraulic connections, safety devices, and control-system signals.
- Solution: Recheck the plant systematically after relocation, correct installation or connection problems, and complete no-load and loaded commissioning before returning to continuous production.
Incorrect Operating Settings: Feed Rate, Temperature and Mixing Control
- Symptoms: Production is unstable, material quality varies, temperatures fluctuate, or equipment becomes overloaded even though the plant itself appears mechanically sound.
- Possible causes: Incorrect feed rate, unsuitable temperature settings, inappropriate mixing conditions, incorrect equipment configuration, or operating parameters that do not match the actual material and production conditions.
- What to compare: Compare the operating settings with actual feed rates, material temperatures, production output, mixer load, and the requirements of the selected mix.
- Adjustment: Restore suitable operating parameters step by step, verify the actual plant response, and avoid changing multiple settings at the same time when identifying the source of the problem.
Quick troubleshooting: After installation or relocation, do not judge the plant only by whether it can start. Check alignment, mechanical connections, electrical and hydraulic systems, safety functions, and operating settings before moving to continuous production. This helps prevent installation problems from developing into equipment or production failures.
Asphalt Plant Problems Caused by Materials and Weather
Aggregate characteristics, moisture, storage conditions, and weather can affect asphalt plant performance even when the equipment is operating normally. High-moisture materials may increase drying demand, while rain, cold temperatures, or difficult aggregate properties can change material flow and heating conditions. Adjust plant operation to the actual material and site conditions rather than treating every production problem as an equipment failure.
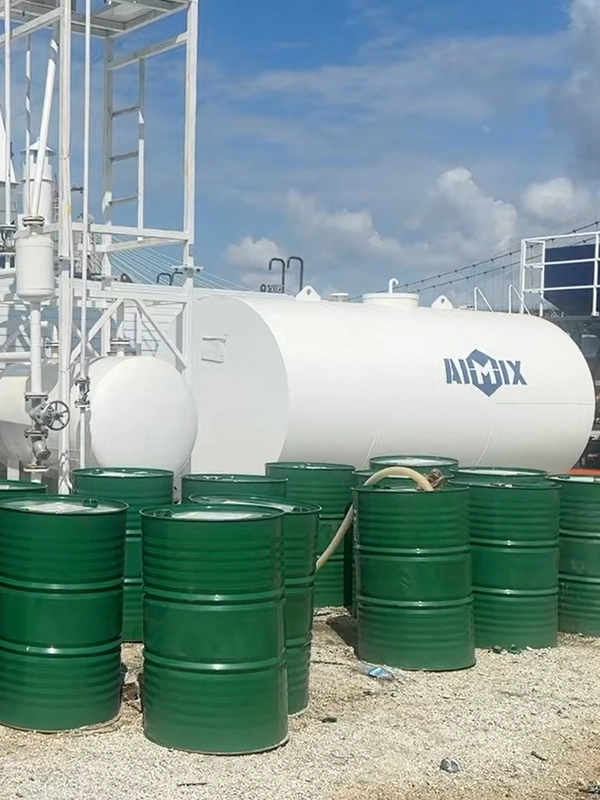
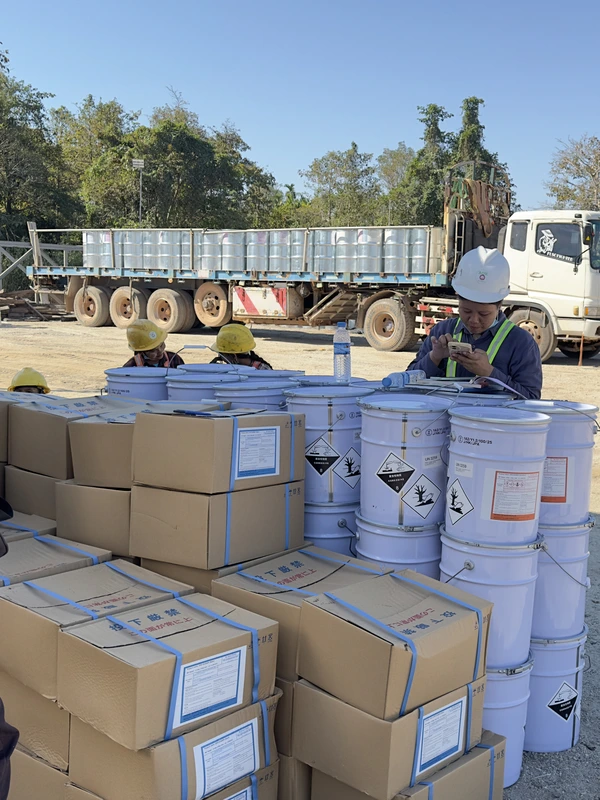
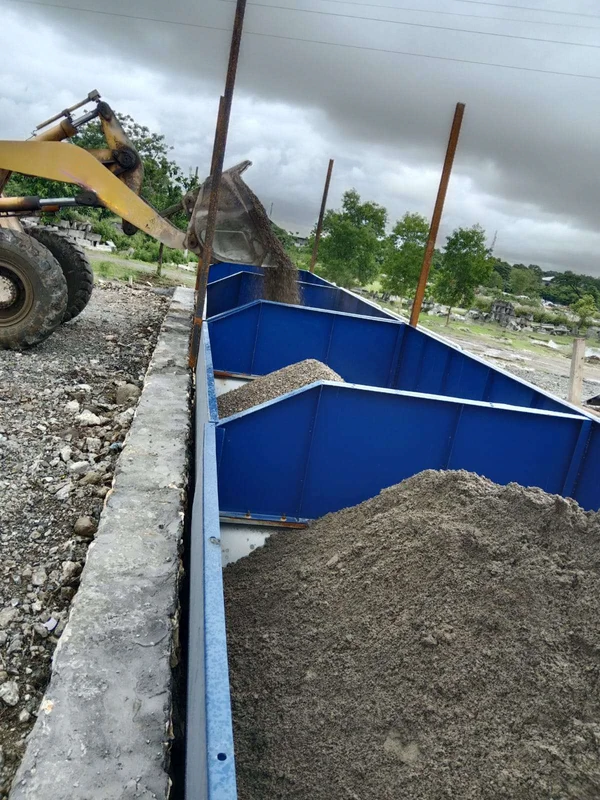
High-Moisture Aggregate: Drying Load and Production Adjustment
- Symptoms: Aggregate takes longer to reach the required temperature, production output decreases, or fuel consumption increases during normal operation.
- Why it happens: Wet aggregate requires more heat and drying time before it can enter the mixing process under suitable conditions.
- What to check: Check incoming aggregate moisture, dryer performance, burner operation, feed rate, and the actual aggregate temperature after drying.
- Solution: Improve aggregate drainage and storage, stabilize the drying process, and reduce the feed rate when the moisture load exceeds the practical drying capacity of the plant.
Rainy Weather: Aggregate Storage and Moisture Control
- Signs: Aggregate moisture changes during production, drying becomes less stable, or material flow and mix temperature become more difficult to control.
- Common causes: Rainwater entering stockpiles, poor drainage, uncovered aggregate, or different moisture levels between material batches.
- Check first: Inspect stockpile drainage, aggregate covering, material condition, feeder flow, and moisture differences between aggregate sources.
- Fix: Improve drainage and rain protection, separate materials with significantly different moisture conditions, and adjust production according to the actual moisture entering the plant.
Cold Weather: Heating and Temperature Retention
- Symptoms: Aggregate or asphalt binder reaches operating temperature slowly, mix temperature drops during transfer, or the plant requires longer heating periods.
- Likely causes: Low ambient temperature, increased heat loss, cold aggregate, reduced heat retention in tanks or pipelines, or insufficient heating performance.
- What to check: Check aggregate temperature, burner operation, dryer performance, asphalt heating, pipeline insulation, and temperature changes between process stages.
- Solution: Allow the heating system to reach stable operating conditions, reduce unnecessary heat loss, maintain suitable insulation, and adjust production when the available heating capacity is temporarily reduced.
Hot Weather: Temperature and Material Handling Control
- Symptoms: Asphalt materials become difficult to handle, stored mix loses temperature slowly, or excessive material temperature creates operating concerns.
- Possible causes: High ambient temperature, excessive heating, prolonged material storage, or insufficient control of material exposure and transfer conditions.
- What to compare: Compare material temperature at different stages, heating settings, storage time, transfer conditions, and the actual ambient conditions.
- Adjustment: Keep material temperatures within the required operating range, avoid unnecessary heating or prolonged storage, and improve material handling where excessive heat retention affects production.
Difficult Aggregate Characteristics: Feeding and Heating Adjustment
- Signs: Aggregate flow becomes unstable, drying performance changes, or the plant requires different operating conditions for certain aggregate sources.
- Why it happens: Aggregate size, shape, gradation, surface characteristics, moisture, or other material properties can affect feeding, drying, and handling.
- What to check: Check aggregate gradation, moisture, particle characteristics, feeder flow, stockpile condition, and dryer performance.
- Solution: Stabilize aggregate feeding, adjust the production rate when necessary, and optimize drying and material handling according to the actual aggregate characteristics.
Poor Aggregate Storage: Moisture and Segregation Prevention
- Symptoms: Aggregate moisture varies significantly, feeder flow becomes inconsistent, or mix gradation changes during production.
- Common causes: Poor stockpile drainage, mixing of different aggregate sizes, excessive stockpile handling, or segregation during storage and loading.
- Where to check: Inspect stockpile layout, drainage, separation between aggregate sizes, loading practices, and the condition of material entering the cold feed bins.
- Solution: Keep aggregate sizes properly separated, improve drainage, minimize unnecessary material handling, and maintain consistent stockpile management from storage to feeding.
Fuel or Power Supply Problems: Stable Energy and Equipment Control
- Symptoms: Burner performance becomes unstable, heating capacity drops, motors stop unexpectedly, or production cannot maintain normal operating conditions.
- Possible causes: Unstable fuel supply, insufficient fuel quality, power interruptions, generator problems, or fluctuations in the available energy supply.
- What to check: Check fuel availability and supply condition, power stability, generator or external power source, and whether multiple plant systems are affected at the same time.
- Solution: Restore a stable energy supply, correct the external fuel or power problem, and verify plant operation before increasing production again.
Quick troubleshooting: When plant performance changes with weather or a new aggregate source, compare the material moisture, material characteristics, ambient conditions, and production records before changing equipment settings. Many apparent equipment problems are actually caused by changes in the materials or operating environment.
Asphalt Plant Maintenance and Preventive Solutions
Regular maintenance helps prevent unexpected shutdowns, equipment damage, and unstable asphalt production. A practical maintenance program should cover material feeding, heating, weighing, conveying, mixing, asphalt supply, dust collection, and electrical systems. Inspect critical components routinely and address abnormal wear, buildup, leakage, or performance changes before they develop into production failures.
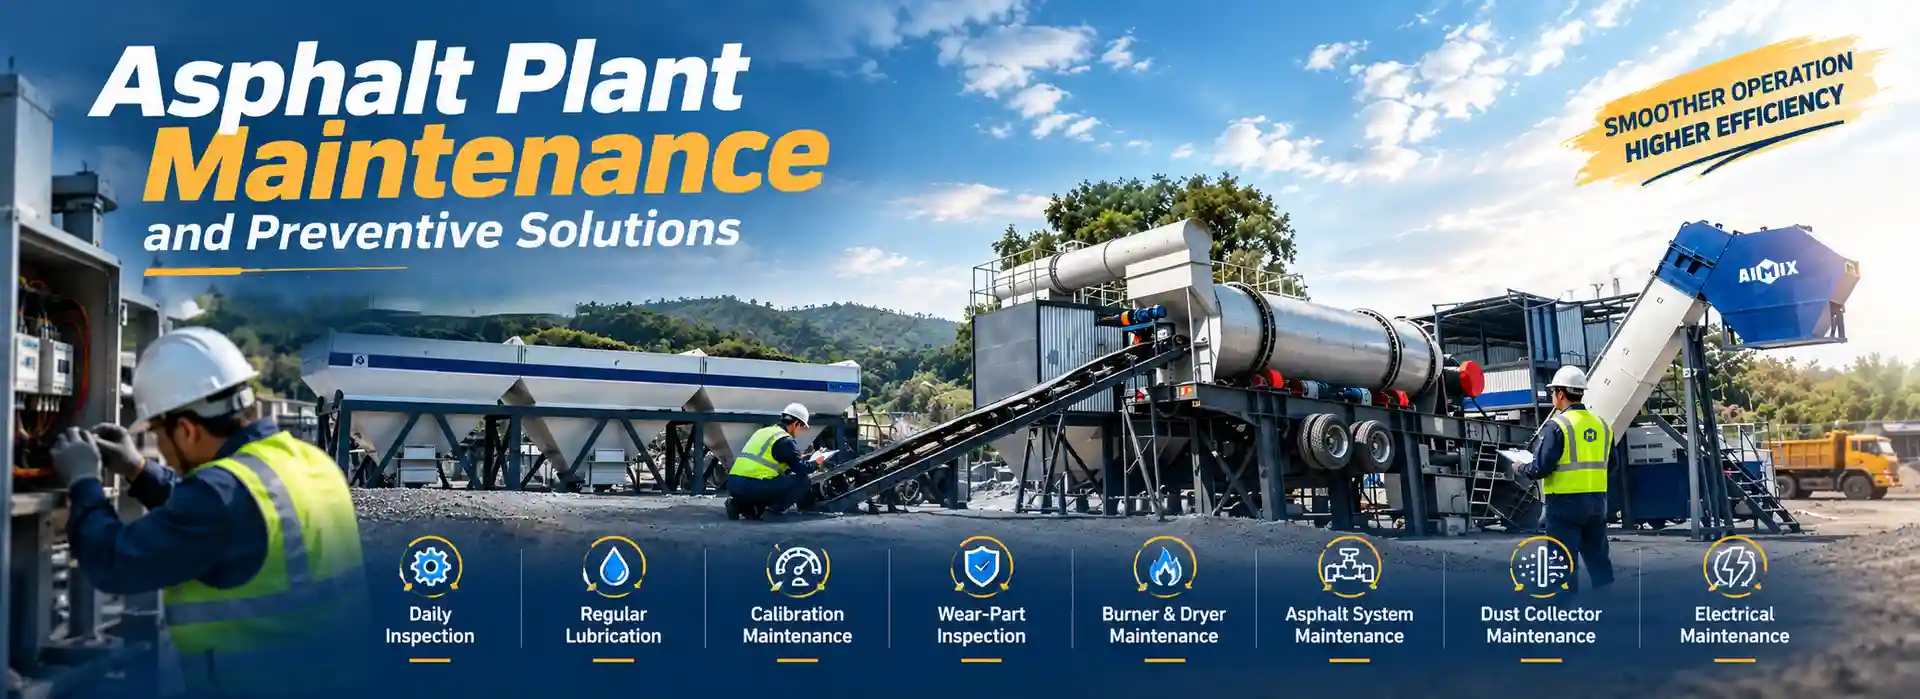
Daily Inspection: Feeding, Heating and Mechanical Checks
- Check material feeding: Inspect cold feed bins, feeders, conveyors, and material flow for blockage, buildup, belt misalignment, or abnormal movement.
- Check heating systems: Check the burner, dryer, aggregate temperature, fuel supply, and visible signs of abnormal combustion or heat loss.
- Check mechanical components: Look for unusual noise, vibration, overheating, leakage, or loose connections around major moving equipment.
- Before production: Confirm that guards, safety devices, access areas, and other critical components are in suitable condition before starting normal production.
Regular Lubrication: Bearings, Chains and Moving Components
- Focus areas: Pay particular attention to bearings, chains, sprockets, shafts, and other moving components that require regular lubrication.
- Check lubricant condition: Look for insufficient lubricant, contamination, leakage, or signs of overheating around lubrication points.
- Follow equipment requirements: Use the specified lubricant and maintenance interval for each component rather than applying the same maintenance schedule to every part.
- After lubrication: Check the component during operation for abnormal noise, temperature, or movement that may indicate an underlying mechanical problem.
Calibration Maintenance: Weighing, Metering and Temperature Systems
- Inspect measurement systems: Check aggregate scales, asphalt binder meters, temperature sensors, and other measurement devices for abnormal readings.
- Verify zero and signal stability: Confirm that weighing systems return to their expected zero condition and that readings remain stable during operation.
- Compare actual and displayed values: When a reading appears abnormal, compare the control-system value with the actual material quantity or process condition before changing production settings.
- Maintain calibration: Follow the equipment-specific calibration procedure and schedule, especially after maintenance, component replacement, or significant changes in measurement accuracy.
Wear-Part Inspection: Belts, Blades, Flights and Bearings
- Inspect conveying parts: Check belts, rollers, cleaners, bucket elevator chains, and related components for wear, damage, misalignment, or abnormal tracking.
- Inspect mixer components: Check mixer blades, paddles, liners, and mounting hardware for wear that could affect mixing performance.
- Inspect dryer components: Check dryer flights, support rollers, and other wear-prone components for deformation, damage, or excessive wear.
- Replace when necessary: Replace components that have reached their applicable service limits or show damage that could affect equipment safety or performance.
Burner and Dryer Maintenance: Combustion and Heating Efficiency
- Inspect the burner: Check the burner, fuel supply, ignition components, and air supply for abnormal operation or contamination.
- Check dryer performance: Monitor aggregate moisture, drying performance, temperature stability, and material flow through the dryer.
- Keep the system clean: Remove accumulated material and inspect relevant areas where buildup can restrict airflow or affect heat transfer.
- Monitor fuel use: A gradual increase in fuel consumption can indicate higher aggregate moisture, combustion problems, heat loss, or declining dryer performance and should be investigated.
Asphalt System Maintenance: Pumps, Valves and Pipelines
- Inspect pumps: Check pump operation, bearings, connections, lubrication where applicable, and signs of abnormal noise, leakage, or reduced flow.
- Check heated lines: Inspect asphalt pipelines, valves, insulation, and heating components to prevent solidification and flow restrictions.
- Look for leakage: Inspect flanges, joints, seals, valves, and pump connections for asphalt leakage or signs of damaged components.
- Before shutdown or restart: Follow the equipment’s specified heating, shutdown, and restart procedures to reduce the risk of asphalt solidification or pipeline blockage.
Dust Collector Maintenance: Filters, Ducts and Airflow
- Inspect filter bags: Check for excessive dust loading, damage, poor sealing, or signs that filtration performance has deteriorated.
- Check the airflow path: Inspect ducts, connections, dampers, and other areas for dust buildup, leakage, or restricted airflow.
- Monitor pressure: Track changes in baghouse pressure and investigate abnormal increases or unstable readings before they affect dust collection performance.
- Maintain dust removal: Keep dust discharge and return paths clear and confirm that collected material can move through the system normally.
Electrical Maintenance: Motors, Wiring, Sensors and Controls
- Inspect motors: Check motors for abnormal noise, overheating, vibration, or signs of overload during normal operation.
- Check connections: Inspect electrical terminals, connectors, cables, and control-panel components for looseness, damage, or abnormal conditions.
- Verify sensors: Check temperature sensors, limit switches, and other control inputs for stable signals and proper response.
- Maintain safety controls: Regularly verify emergency stops, protective devices, interlocks, and other safety-related control functions according to the equipment maintenance procedure.
Maintenance tip: Keep records of inspections, lubrication, calibration, wear-part replacement, and abnormal operating conditions. Comparing maintenance records with production performance can help identify recurring problems and schedule repairs before they cause unexpected downtime.
Asphalt Plant Safety and Emergency Problems
Some asphalt plant problems require immediate action because they involve hot asphalt, fuel, high voltage, moving equipment, or structural components. In these situations, protecting personnel and preventing secondary damage should come before restoring production. Stop the affected equipment when necessary, isolate the relevant energy source, keep unauthorized personnel away from the hazard, and have qualified personnel inspect the system before restarting.
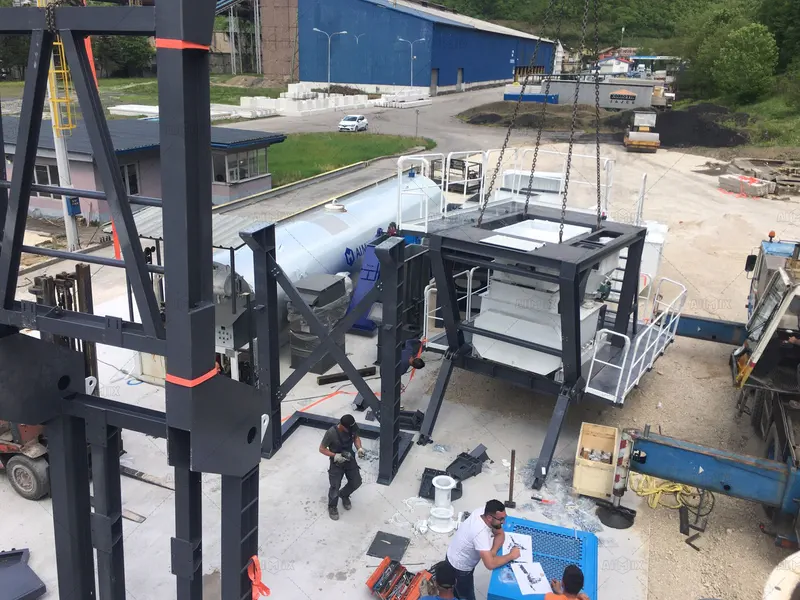
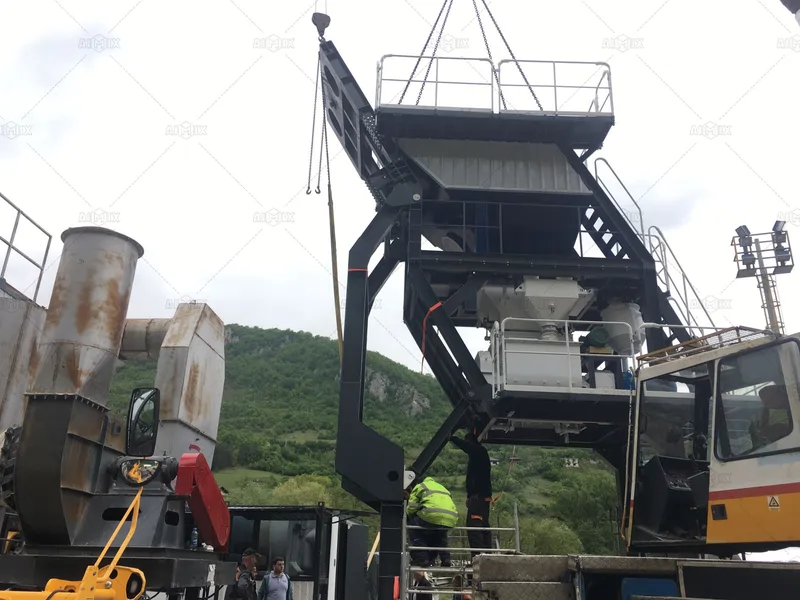
Asphalt or Fuel Leakage: Shutdown and Inspection
- Warning signs: Asphalt, fuel, or other operating fluids are visible around tanks, pumps, pipelines, valves, burners, or connections.
- Immediate concern: Hot asphalt can cause severe burns, while fuel leakage can create fire and environmental hazards, particularly near hot surfaces or ignition sources.
- What to do: Stop the affected system when safe to do so, isolate the relevant source, keep personnel away from the leakage area, and follow the plant’s emergency procedure.
- Before restart: Identify and repair the leakage source, inspect nearby components for damage, and confirm that the system is safe before returning it to operation.
Fire and Explosion Risks: Fuel, Asphalt and High-Temperature Systems
- Warning signs: Fuel leakage, abnormal burner behavior, unusual flames or smoke, flammable-liquid contamination, or uncontrolled high-temperature conditions.
- Why it is serious: Asphalt plants combine fuel, hot materials, heated pipelines, burners, and electrical equipment, creating conditions where a fault can develop into a fire or explosion hazard.
- Immediate response: Stop the affected equipment when safe, follow the plant emergency procedure, isolate energy or fuel sources as required, and keep personnel away from the hazard.
- Before restart: Do not resume production until the source of the hazard has been identified, the affected system has been inspected by qualified personnel, and the plant’s safety requirements have been satisfied.
Severe Electrical Faults: Power Isolation and Professional Inspection
- Warning signs: Smoke, burning smells, sparks, repeated electrical trips, damaged cables, abnormal electrical noise, or visible component damage.
- Possible risks: Electrical faults can cause electric shock, equipment damage, fire, or unexpected startup of connected equipment.
- Immediate action: Stop the affected equipment when safe, isolate the relevant power source using the plant’s approved procedure, and keep unauthorized personnel away from the equipment.
- Before restart: Have qualified electrical personnel identify and correct the fault, inspect affected components, and verify the electrical and safety systems before restoring operation.
Severe Mechanical Vibration: Equipment Shutdown and Inspection
- Warning signs: Sudden or severe vibration, abnormal knocking or grinding, visible component movement, or rapid changes in bearing temperature.
- Likely risks: Continued operation may worsen bearing, shaft, drive, structural, or other mechanical damage.
- Immediate response: Stop the affected equipment when safe and keep personnel away from moving components until the equipment has come to a safe condition.
- Before restart: Inspect the source of the vibration, correct the underlying mechanical problem, and verify stable operation before returning the equipment to production.
Structural Damage: Immediate Shutdown and Assessment
- Warning signs: Cracks, deformation, abnormal movement, damaged supports, significant corrosion, or unexpected changes in structural alignment.
- Why it matters: Structural damage can affect equipment stability and may create a risk of component failure or collapse.
- Immediate action: Stop operation in the affected area when safe, restrict access, and prevent additional loading or movement until the condition has been assessed.
- Before restart: Have qualified personnel evaluate the damaged structure and confirm that the equipment has been properly repaired and is safe for operation.
Failed Safety Interlocks: Control System Inspection Before Restart
- Symptoms: Equipment can operate without the required safety condition, an interlock does not respond, or the control system shows inconsistent safety signals.
- Possible causes: Faulty sensors, limit switches, wiring, control components, or changes to the safety-control circuit.
- What to do: Stop the affected operation and prevent normal production from continuing while the failed safety function is being investigated.
- Before restart: Repair the underlying fault and verify the complete interlock or safety function according to the plant’s safety procedure before allowing normal operation.
Safety First
Do not bypass emergency stops, safety interlocks, protective devices, or other safety functions to keep the asphalt plant running. For fire, electrical, structural, or other serious hazards, follow the site’s emergency procedure and use qualified personnel for inspection and repair.
Emergency principle: When a problem presents an immediate risk to people or equipment, stop, isolate, secure the affected area, inspect, repair, and verify before restarting. Production should resume only after the relevant safety conditions have been confirmed.
Asphalt Plant Troubleshooting Process
When an asphalt plant problem occurs, troubleshooting should follow a clear process instead of changing several operating settings at once. Start with the actual symptoms, check material and operating conditions, inspect the relevant equipment, and then trace the control signals to identify the root cause. After the repair, test the affected system and monitor production before returning to normal operation.
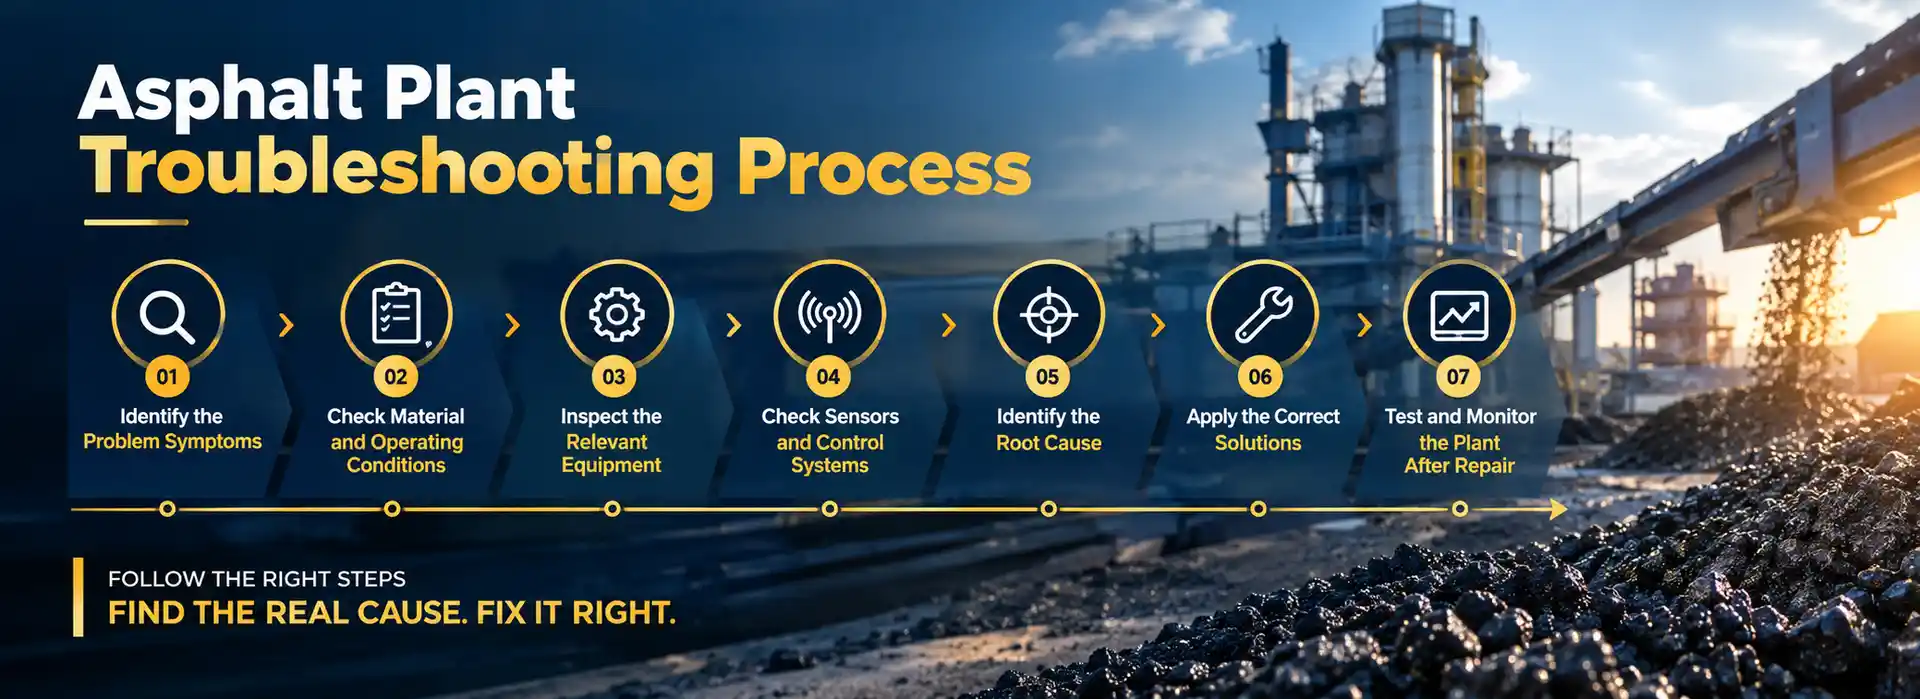
Identify the Problem Symptoms
Start by recording what changed and when the problem appeared. Check whether the issue involves production output, material flow, temperature, mix quality, abnormal noise, vibration, leakage, electrical signals, or equipment movement. Note whether the problem affects the whole plant or only one component, and whether it occurs continuously or intermittently.
Check Material and Operating Conditions
Before disassembling equipment, confirm that the operating conditions have not changed. Check aggregate moisture, material characteristics, feed rate, asphalt supply, fuel or power availability, production rate, and relevant temperature conditions. A change in material or weather conditions can sometimes produce symptoms that look like equipment failure.
Inspect the Relevant Equipment
Once the operating conditions are confirmed, inspect the equipment directly related to the problem. Check for blockage, material buildup, misalignment, excessive wear, loose connections, abnormal lubrication, leakage, or mechanical damage. Focus on the equipment closest to where the abnormal condition first appears rather than inspecting the entire plant without a clear direction.
Check Sensors and Control Systems
If the mechanical condition appears normal but the control system shows an abnormal value, compare the displayed signal with the actual equipment condition. Inspect relevant sensors, limit switches, wiring, connectors, control inputs, and other measurement components. This helps distinguish a genuine process problem from an inaccurate or unstable signal.
Identify the Root Cause
Separate the symptom from the root cause before making an adjustment. For example, low production may be caused by wet aggregate, unstable feeding, a dryer limitation, or a mechanical blockage rather than insufficient plant capacity. Trace the problem back through the affected process and confirm the cause with operating data and equipment inspection.
Apply the Correct Solutions to Asphalt Plant Problems
Correct the identified cause rather than repeatedly adjusting production settings to compensate for the symptom. Depending on the problem, this may involve restoring material flow, correcting alignment, cleaning accumulated material, replacing a worn component, repairing a control signal, or adjusting an operating parameter within the equipment requirements.
Test and Monitor the Plant After Repair
After the problem has been corrected, test the affected system under controlled conditions before returning to full production. Check whether the original symptom has disappeared and monitor material flow, temperature, equipment load, mix quality, emissions, and other relevant operating conditions. Record the repair and observed results so that recurring problems can be identified and addressed through preventive maintenance.
Practical troubleshooting rule: Follow the problem from symptom → operating condition → equipment → control signal → root cause → solution → verification. This approach reduces unnecessary adjustments and makes it easier to identify whether the problem comes from materials, operation, mechanical components, or the control system.
AIMIX Asphalt Mixing Plants Built for Reliable Operation
AIMIX offers a complete range of asphalt mixing plants, including batch, drum, mobile, and portable types, with capacities from 20 to 400 TPH. Across different plant configurations, the equipment is designed to make daily production more stable and easier to manage. From material dosing and aggregate screening to component durability, intelligent control, and maintenance, each system addresses common sources of production problems and helps reduce unnecessary downtime.
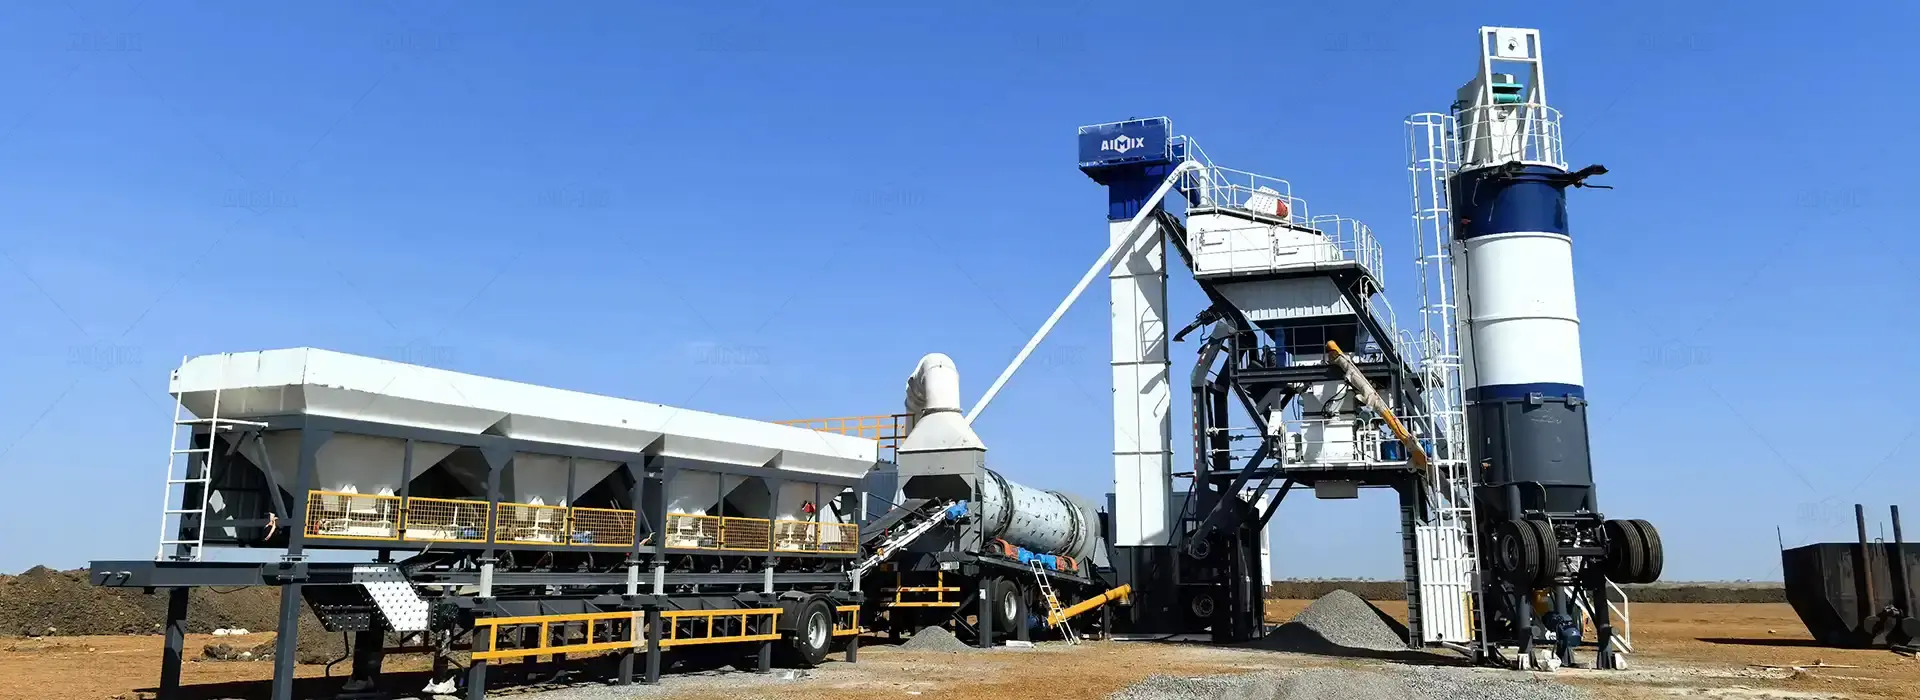
±0.5% Weighing Accuracy for Consistent Mixing
High-precision weighing helps maintain stable aggregate proportions and reduce dosing deviations. On applicable configurations, aggregate weighing accuracy can reach ±0.5%, helping maintain consistent mix quality from batch to batch.
1M+ Tons of Service Life for Heavy-Duty Components
Durable wear components help reduce premature wear and frequent replacement. Selected components are designed for more than 1 million tons of asphalt production, helping minimize maintenance interruptions during long-term operation.
30% Larger Screening Area for Better Separation
An enlarged screening area improves the separation of different aggregate sizes before mixing. On applicable configurations, a screening area increased by up to 30% helps reduce problems related to poor screening and unstable aggregate gradation.
50 Operations Simplified into One-Click Control
Centralized control brings major production functions together in one system. On applicable configurations, up to 50 operating actions can be simplified into one-click operations, reducing manual adjustments and operating errors.
Up to 25% Lower Maintenance Cost
Intelligent monitoring helps identify abnormal conditions and maintenance needs earlier. On applicable intelligent configurations, this can reduce maintenance costs by up to 25% and help prevent minor issues from becoming longer production interruptions.
Up to 50% Lower Emergency Repair Cost
Early fault detection and predictive maintenance help address potential issues before they become major failures. On applicable intelligent configurations, emergency repair costs can be reduced by up to 50%, making equipment maintenance more predictable.
Better-designed systems mean fewer avoidable problems. AIMIX combines precision, durability, intelligent control, and practical maintenance features to help customers reduce equipment issues, limit unexpected downtime, and keep asphalt production running more consistently.
Learn More About AIMIX Asphalt Plants

Asphalt Plant Problems and Solutions FAQs
Have questions about asphalt plant problems, production issues, or troubleshooting? Find quick answers to common questions about plant performance, mix quality, heating, asphalt supply, dust collection, and maintenance.
What Are the Most Common Asphalt Plant Problems?
Common problems of asphalt mixing plant include unstable aggregate feeding, inaccurate weighing or metering, insufficient heating, asphalt pump or pipeline blockage, poor mixing, dust collection problems, conveyor faults, electrical failures, and abnormal equipment vibration. The right asphalt plant problem solutions depend on whether the problem comes from materials, operating conditions, mechanical components, or the control system.
Why Is My Asphalt Plant Production Capacity Low?
Low production may be caused by high aggregate moisture, insufficient drying or heating capacity, unstable material feeding, equipment blockage, mixer or conveyor problems, or operating the plant below its practical production rate. Check material moisture, feed rate, heating performance, and equipment load before changing production settings.
Why Is the Asphalt Mix Temperature Too Low?
Low mix temperature can result from wet aggregate, insufficient burner or dryer performance, cold incoming materials, excessive feed rate, heat loss during transfer, or insufficient asphalt heating. Check temperature at different stages to determine where the heat loss or insufficient heating begins.
What Causes Asphalt to Stop Flowing Through the Pipeline?
Asphalt flow may stop because of solidification, insufficient pipeline heating, blocked valves, pump problems, or hardened asphalt inside the line. Check the asphalt temperature, heating system, pump, valves, and pipeline along the material flow path.
Why Is the Asphalt-Aggregate Ratio Incorrect?
An incorrect asphalt-aggregate ratio may result from inaccurate weighing, binder-metering errors, unstable aggregate feeding, or inconsistent asphalt pump flow. Compare actual material delivery with the control-system readings and check the weighing, metering, and feeding systems before changing the mix setting.
Why Does an Asphalt Plant Produce Excessive Dust?
Excessive dust emissions can be caused by damaged or blocked filter bags, insufficient airflow, duct leakage, excessive dust loading, or induced draft fan problems. Check the airflow path from the dryer and dust source through the ducting and dust collector to identify the restriction or leakage point.
What Should I Check When an Asphalt Plant Suddenly Stops?
First determine whether the shutdown affects the whole plant or only one system. Check the power supply and control system for a plant-wide shutdown, then inspect motors, sensors, material blockages, safety interlocks, and other components related to the affected equipment.
How Can I Prevent Asphalt Plant Problems?
Regular inspection and preventive maintenance can reduce unexpected downtime. Check material feeding, heating systems, weighing and metering, conveyors, mixer wear parts, asphalt pumps and pipelines, dust collectors, electrical components, and safety devices according to the equipment’s maintenance requirements.
How Do I Troubleshoot an Asphalt Plant Problem?
Start with the actual symptom and determine when and where the problem occurs. Then check material and operating conditions, inspect the relevant equipment, verify sensors and control signals, identify the root cause, apply the appropriate solutions to asphalt plant problems, and test the system before returning to full production.
Need Help Troubleshooting Your Asphalt Plant?
If you are using an AIMIX asphalt plant and encounter production, equipment, or maintenance problems, our technical team can provide support based on your plant model, configuration, and operating conditions. From troubleshooting and adjustment to spare parts and maintenance guidance, we can help you restore stable plant operation.
Tell us your asphalt plant model, the problem you are experiencing, and the current operating conditions. Our team can help identify the issue and recommend the appropriate next step.